ClickUp Tutorial
How to Use ClickUp for Beginners

ClickUp can be a little overwhelming when you first open it.
You see Spaces, Folders, Lists, Tasks, Docs, Dashboards, Goals, Automations, and a long list of other features.
The problem isn't that ClickUp lacks functionality.
It's that there is so much functionality that beginners often don't know where to start.
You don't need to learn every ClickUp feature to become productive with the platform.
You just need to understand how ClickUp is structured, create a simple workflow, and gradually add more advanced features as your business needs them.
In this ClickUp tutorial, I'll walk you through the platform step by step.
We'll start with the basics, then build a practical workflow that you can adapt to your own business.
You'll learn how to:
Understand Spaces, Folders, and Lists
Create and organize tasks
Assign work to team members
Set deadlines and priorities
Use different ClickUp views
Create recurring tasks
Use Docs for business documentation
Build Dashboards
Automate repetitive work
Use ClickUp AI
Manage projects
Organize client work
Create a simple business workflow
Whether you're completely new to ClickUp or you've already created an account but aren't sure how to structure it, this guide will help you get started.
Watch the Full ClickUp Tutorial
Prefer watching instead of reading? The video below walks through the ClickUp interface and shows how to build a practical workflow from scratch.
[Embed YouTube Video Here]
What Is ClickUp?
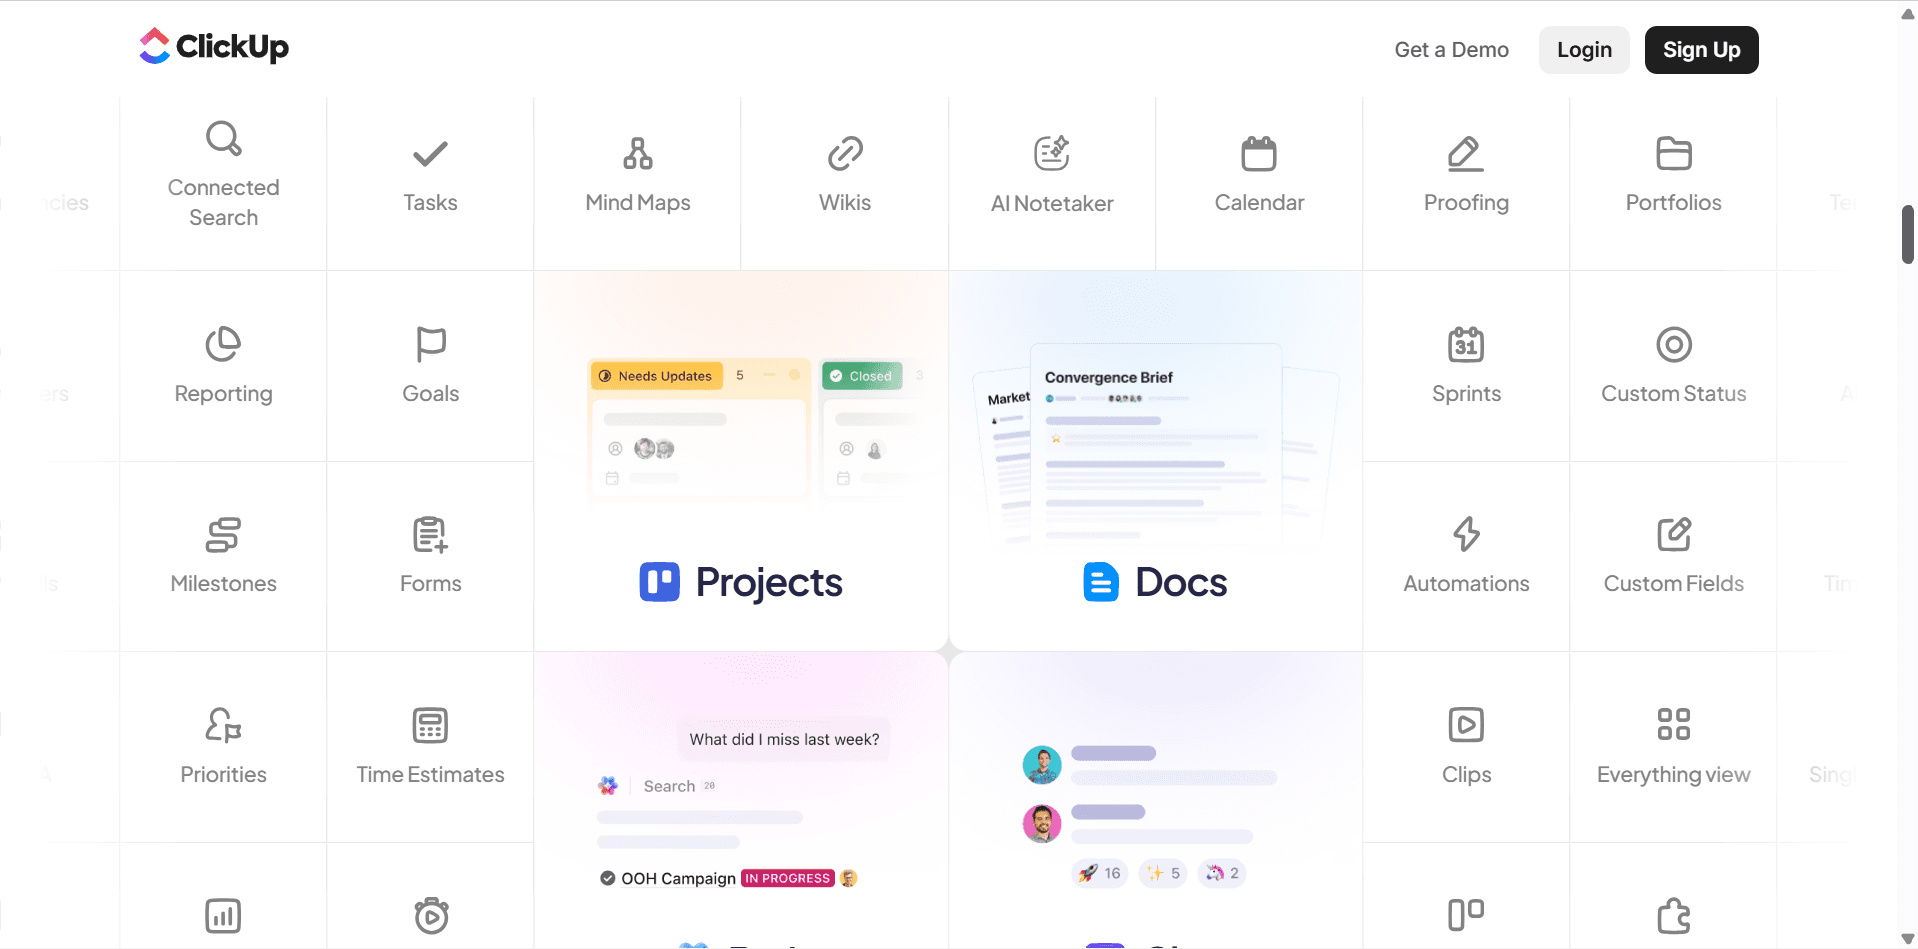
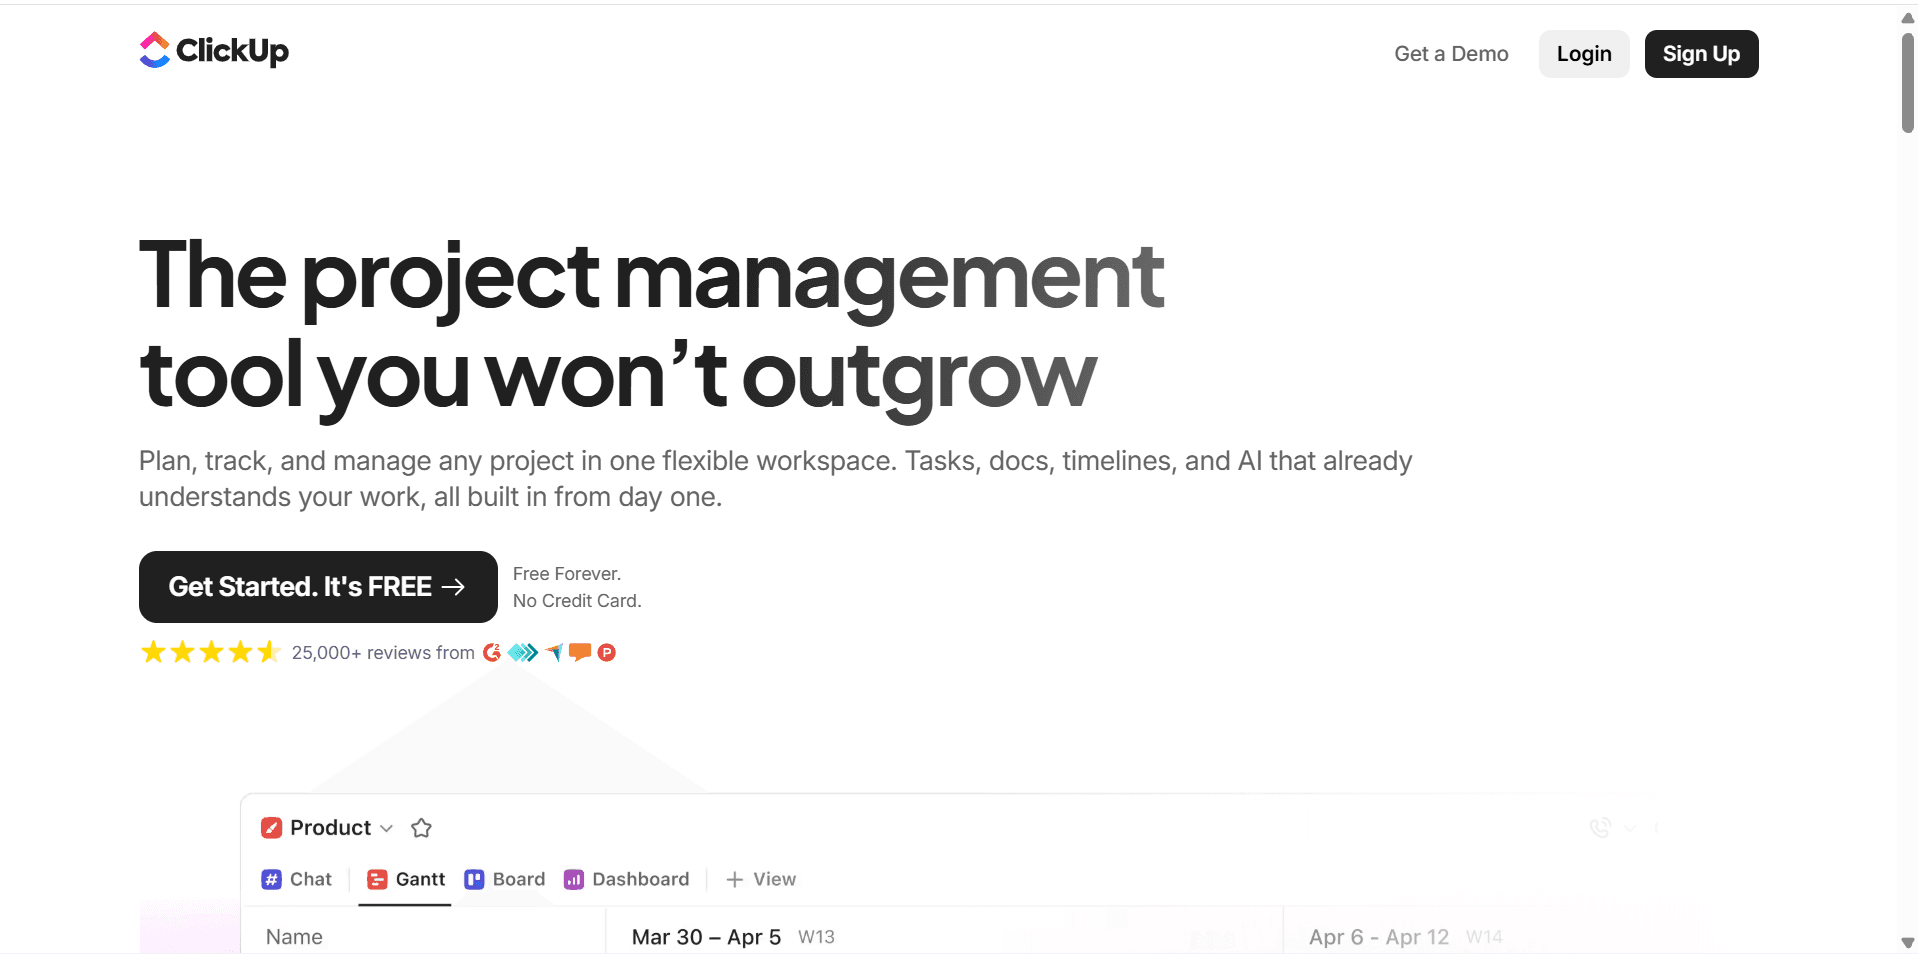
ClickUp is an all-in-one productivity and work management platform designed to help individuals and businesses organize and manage their work.
Depending on how you configure it, you can use ClickUp for:
Project management
Task management
Team collaboration
Client management
Sales workflows
Marketing campaigns
Content planning
Product development
Employee onboarding
Business operations
The biggest advantage of ClickUp is that you don't have to use it in only one way.
A marketing agency can use it to manage client projects.
A software company can use it to track product development.
A consultant can use it to manage client work.
A small business can use it to organize everyday operations.
The platform is flexible enough to adapt to different workflows.
However, that flexibility also means you need to understand how ClickUp's structure works.
That's where we'll start.
Step 1: Understand How ClickUp Is Organized
Before creating your first project, you need to understand ClickUp's hierarchy.
The basic structure looks like this:
Workspace
↓
Spaces
↓
Folders
↓
Lists
↓
Tasks
↓
Subtasks
This structure is one of the most important things to understand as a beginner.
Let's break it down.
Workspace
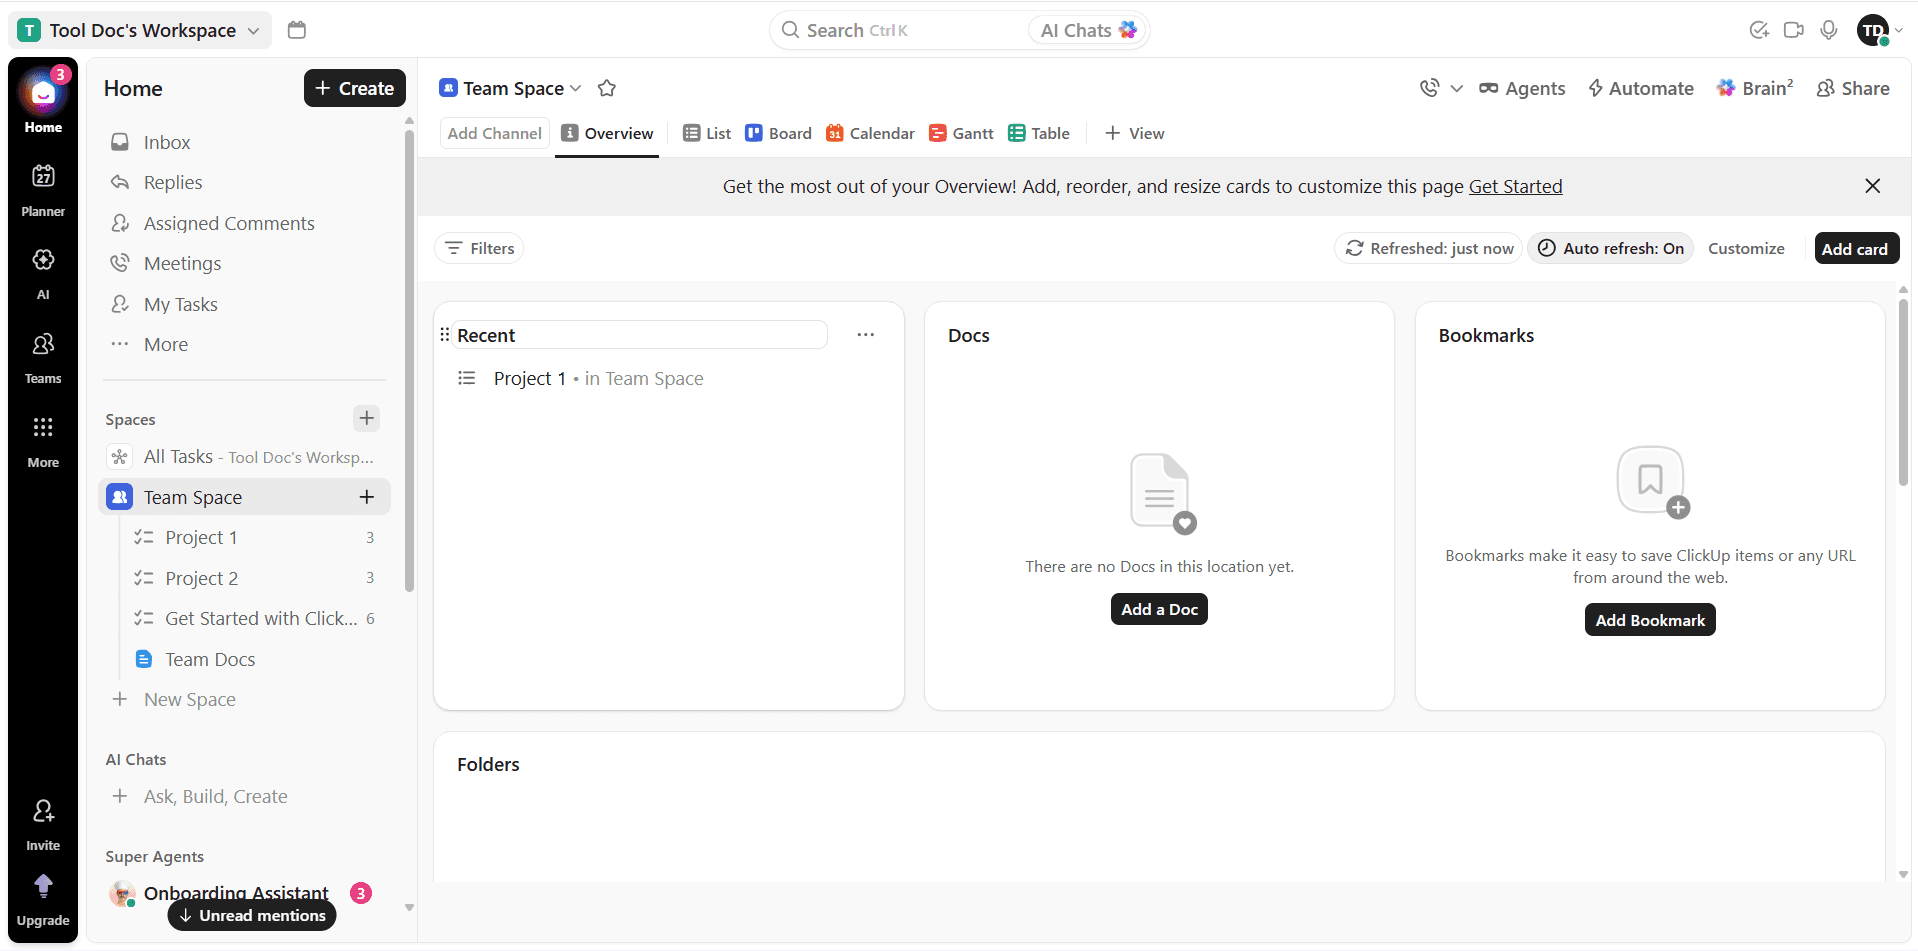
Your Workspace is the top-level environment where your company's work lives.
If you're running a business, you might create one Workspace for your organization.
For example:
Your Company
Inside that Workspace, you could have different Spaces for different departments.
The Workspace acts as the container for everything else.
Spaces
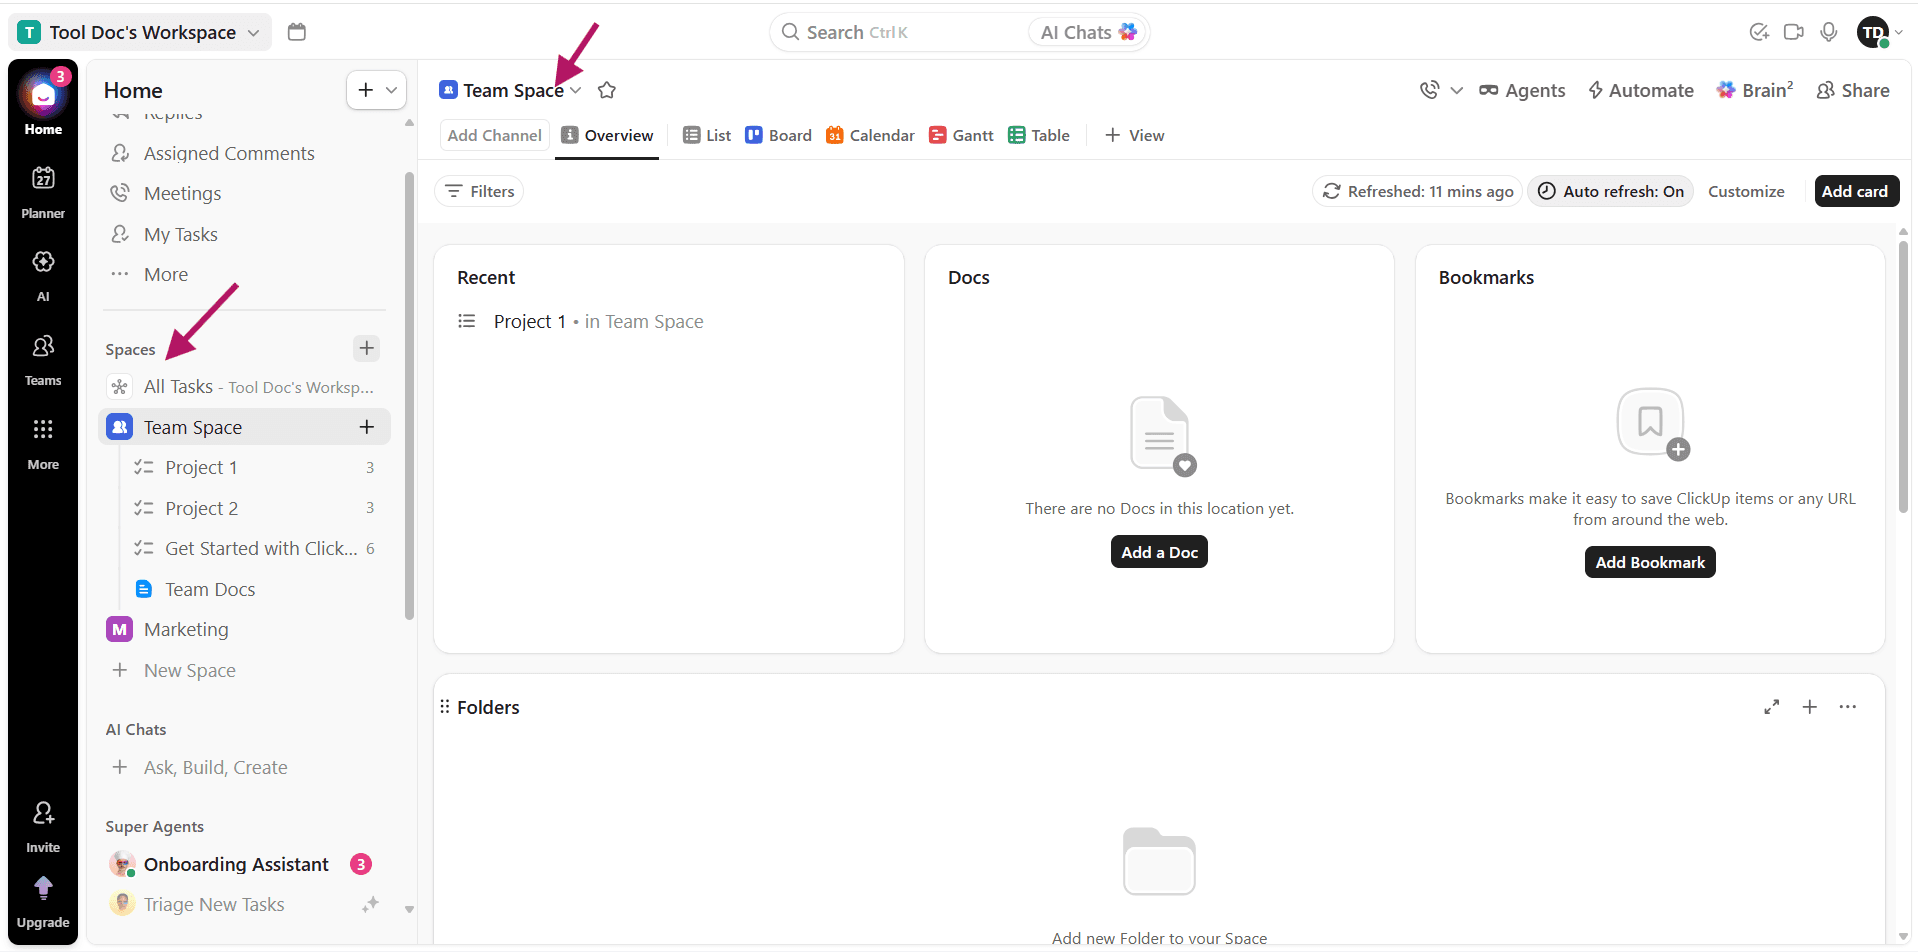
Spaces are usually used to separate major areas of your business.
For example, you might create:
Marketing
Sales
Operations
Human Resources
Product Development
Client Projects
If you're a freelancer, you might use Spaces differently.
You could have:
Personal
Client Work
Business Operations
Content
The important thing is not to overcomplicate your structure.
Create Spaces based on major areas of work that you want to keep separate.
Folders
Folders help you organize related Lists.
For example, inside a Marketing Space, you might create a folder called:
Marketing Campaigns
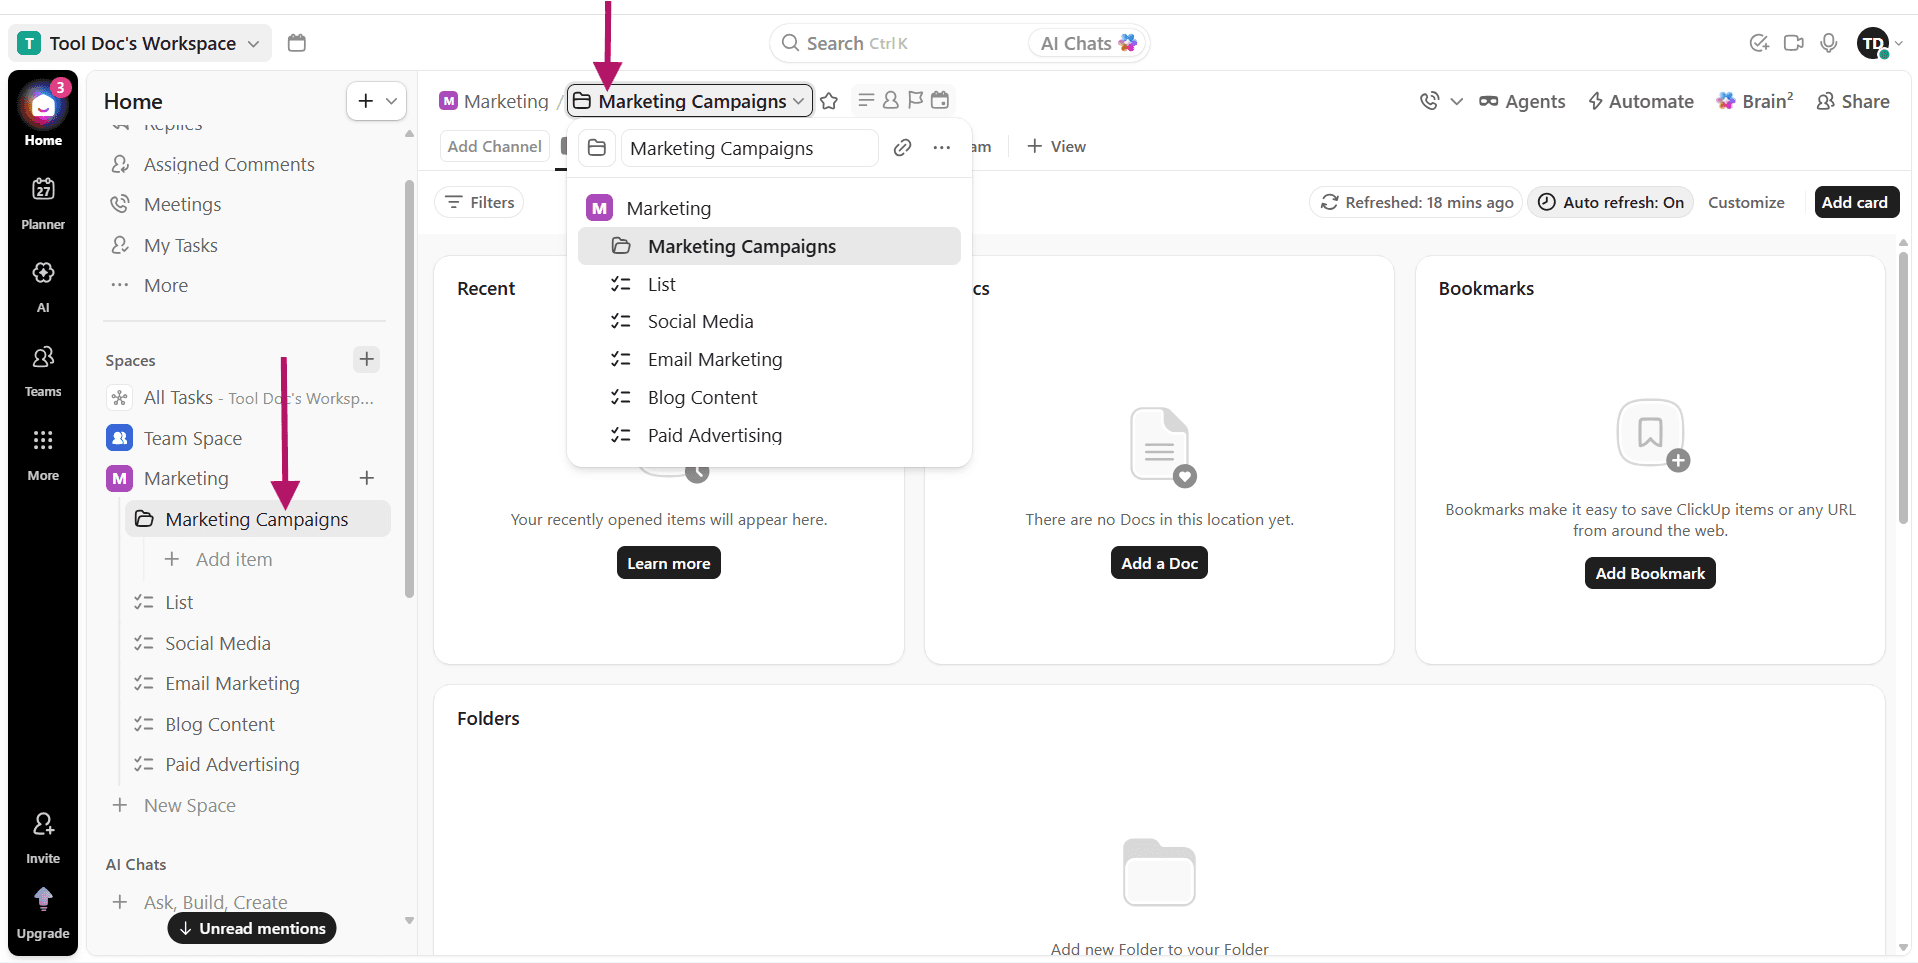
Inside that folder, you could have Lists for:
Social Media
Email Marketing
Blog Content
Paid Advertising
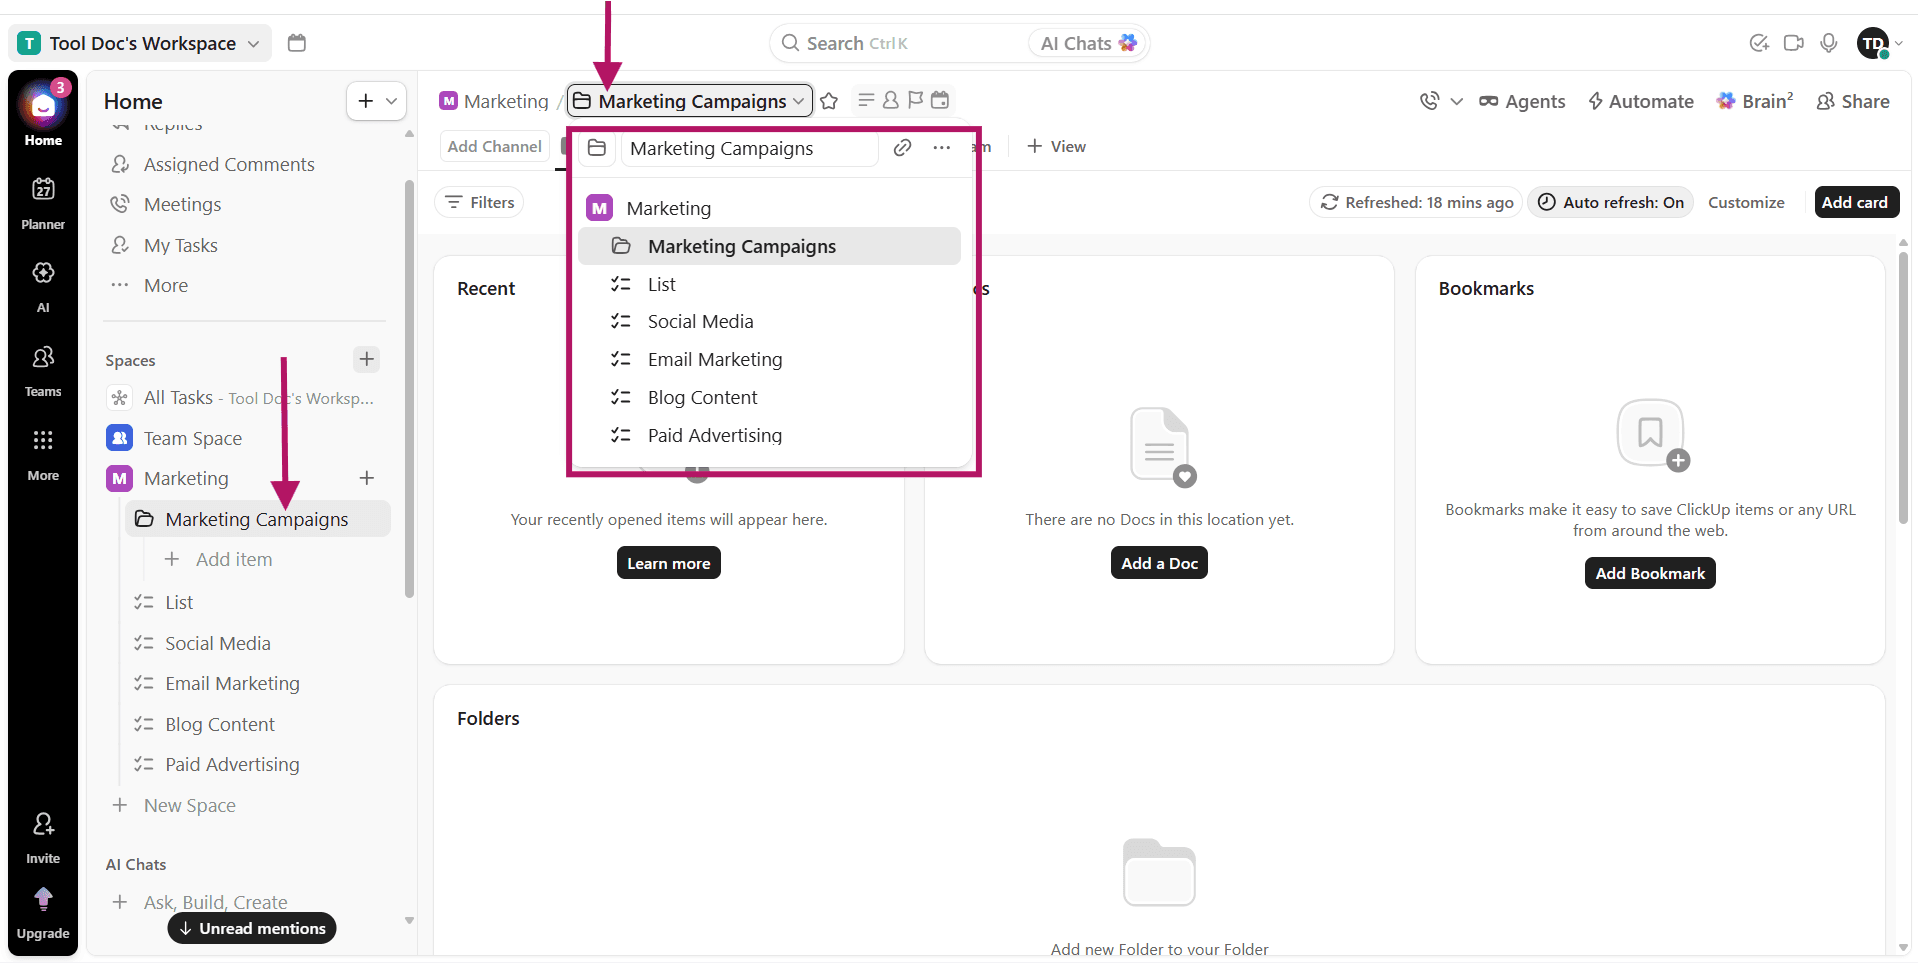
Folders are particularly useful when your business has multiple projects or workflows that belong to the same department.
However, you don't always need them.
If your workflow is simple, you can create Lists directly inside a Space.
Lists
Lists are where your tasks actually live.
Think of a List as a collection of related work.
For example, a marketing team might create:
Space: Marketing
Folder: Content Marketing
List: Blog Content
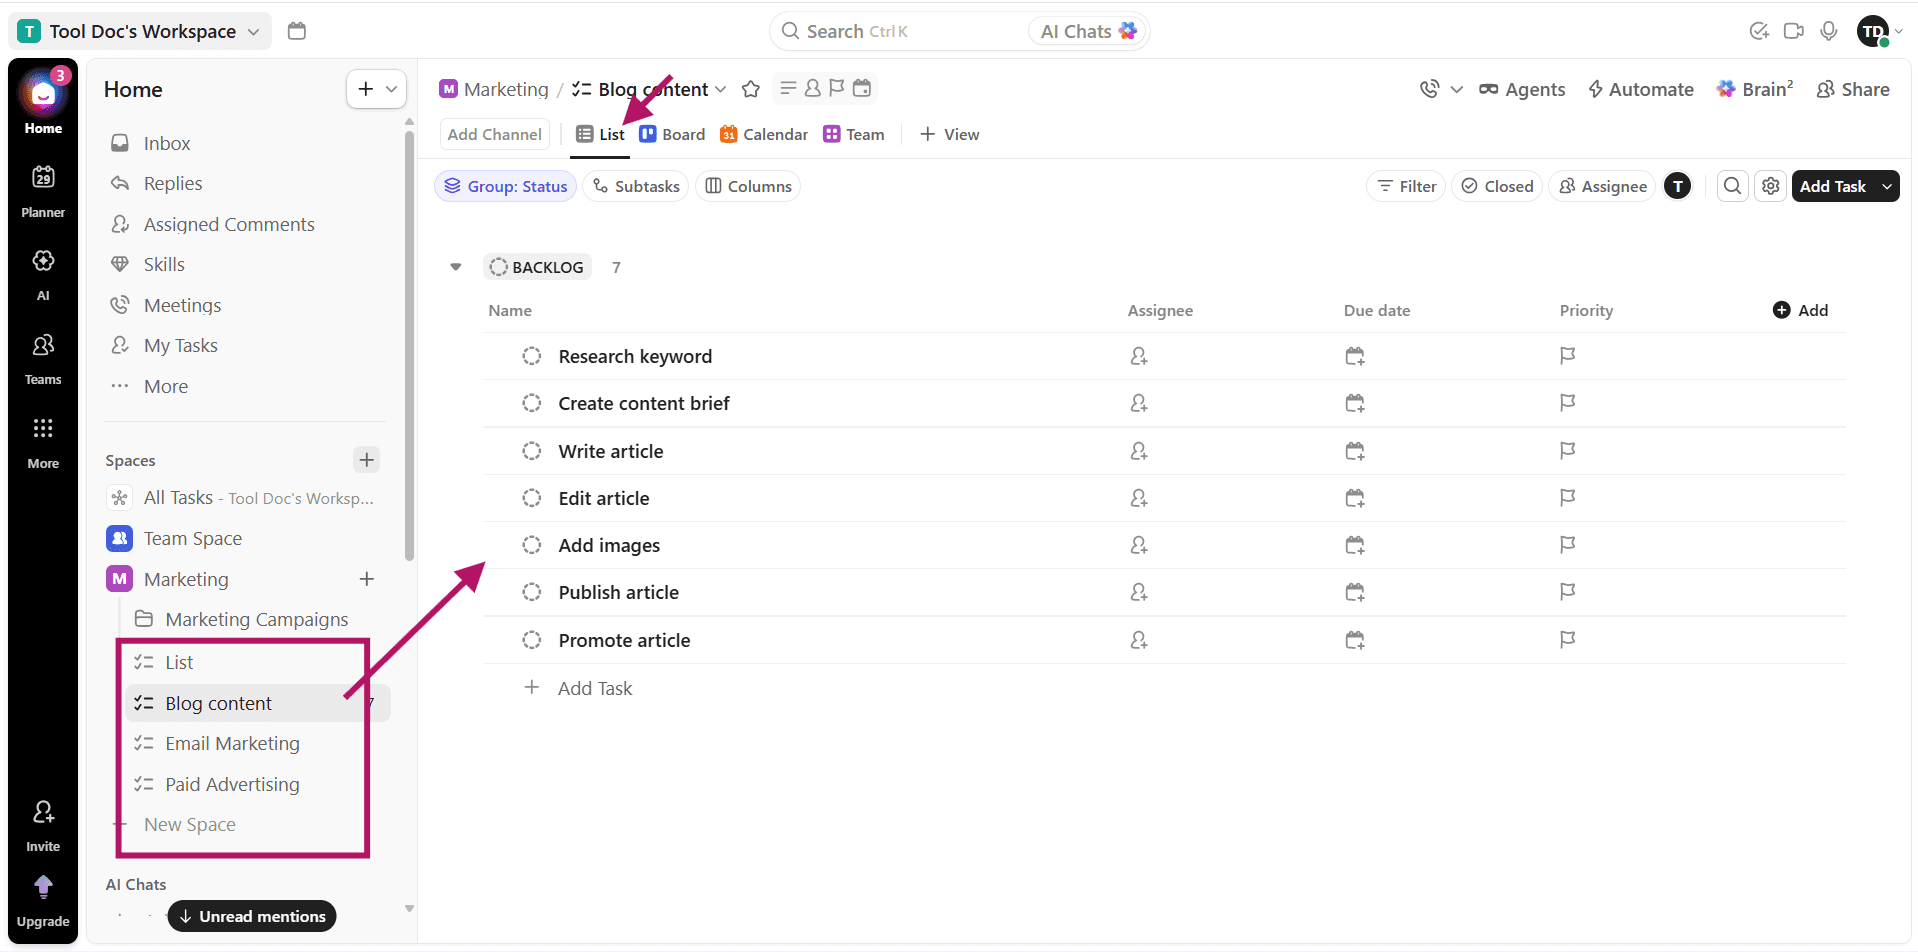
Inside that List, you might create tasks such as:
Research keyword
Create content brief
Write article
Edit article
Add images
Publish article
Promote article
The List becomes the place where your team manages that specific type of work.
Tasks
Tasks are the individual pieces of work that need to be completed.
For example:
Task: Write Blog Article
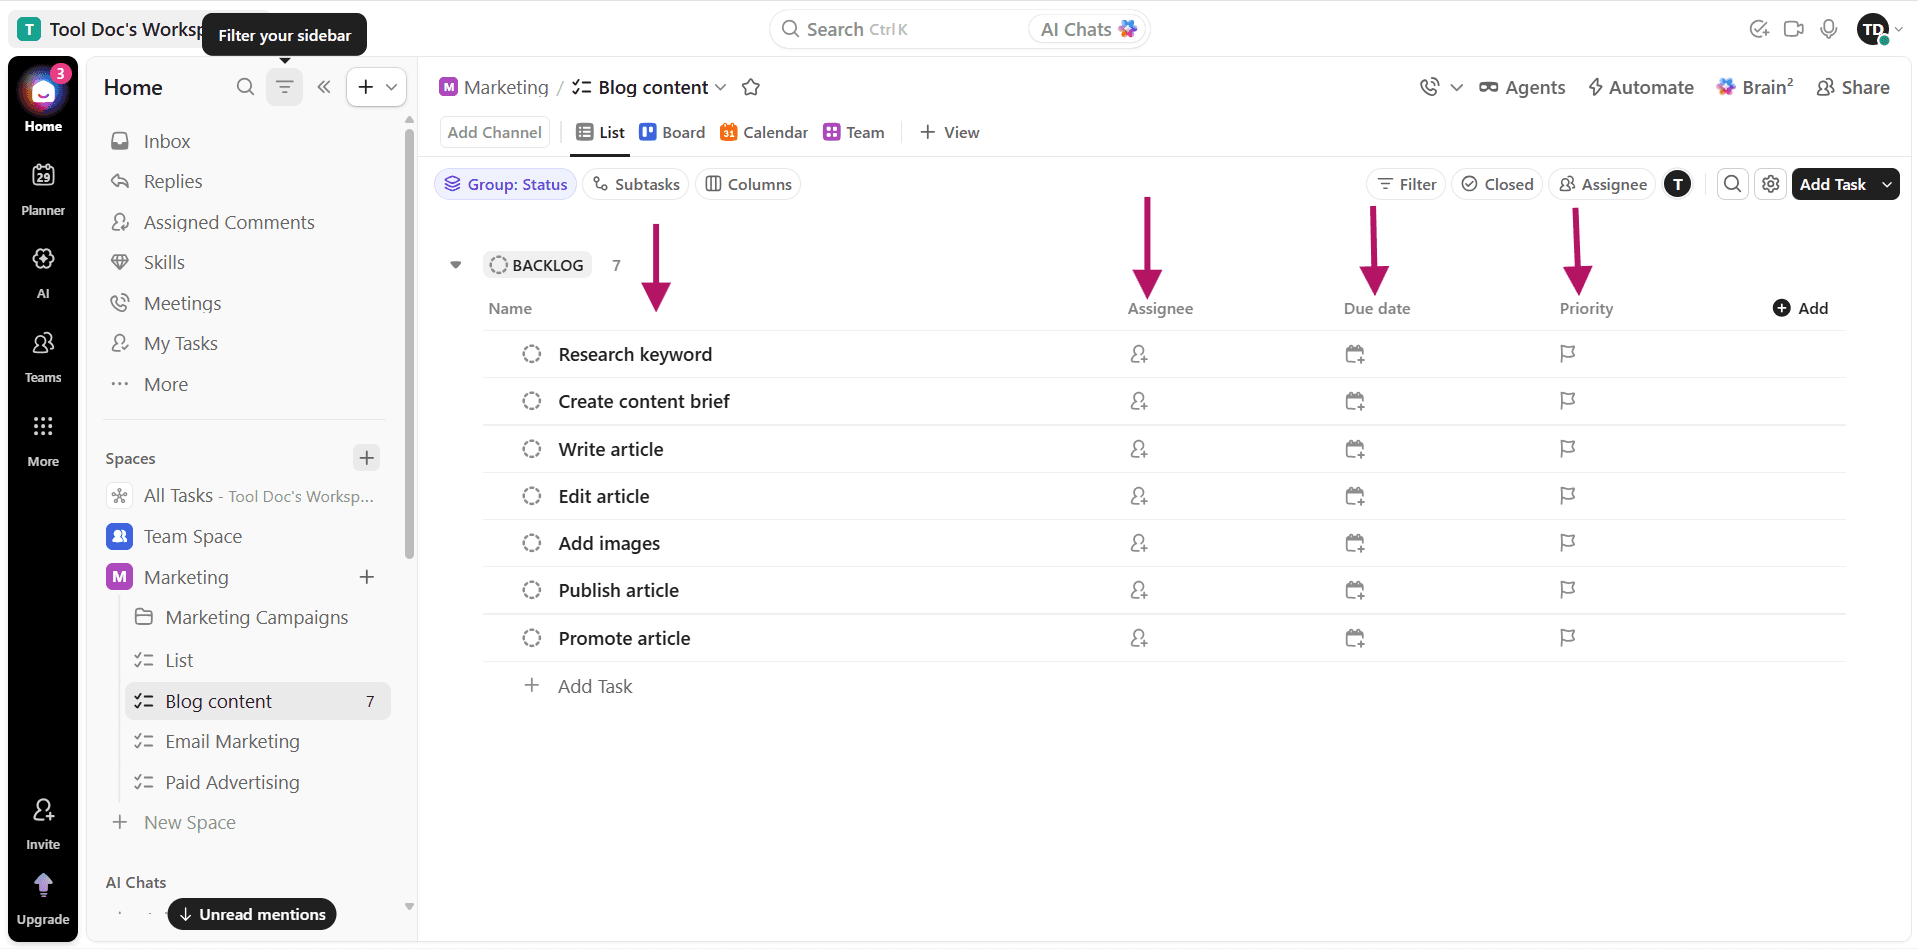
You can then add information such as:
Assignee
Due date
Priority
Status
Description
Attachments
Comments
Subtasks
Tasks are where the actual work gets managed.
Subtasks
Some tasks are too large to complete as a single action.
That's where subtasks come in.
For example:
Task: Launch New Website
Subtasks might include:
Finalize homepage
Review website copy
Test mobile layout
Configure analytics
Check SEO
Test contact forms
Publish website
This allows you to break large projects into smaller, manageable pieces.
Step 2: Create Your First Space
Now that you understand the hierarchy, let's create your first Space.
Click the option to create a new Space and give it a name.
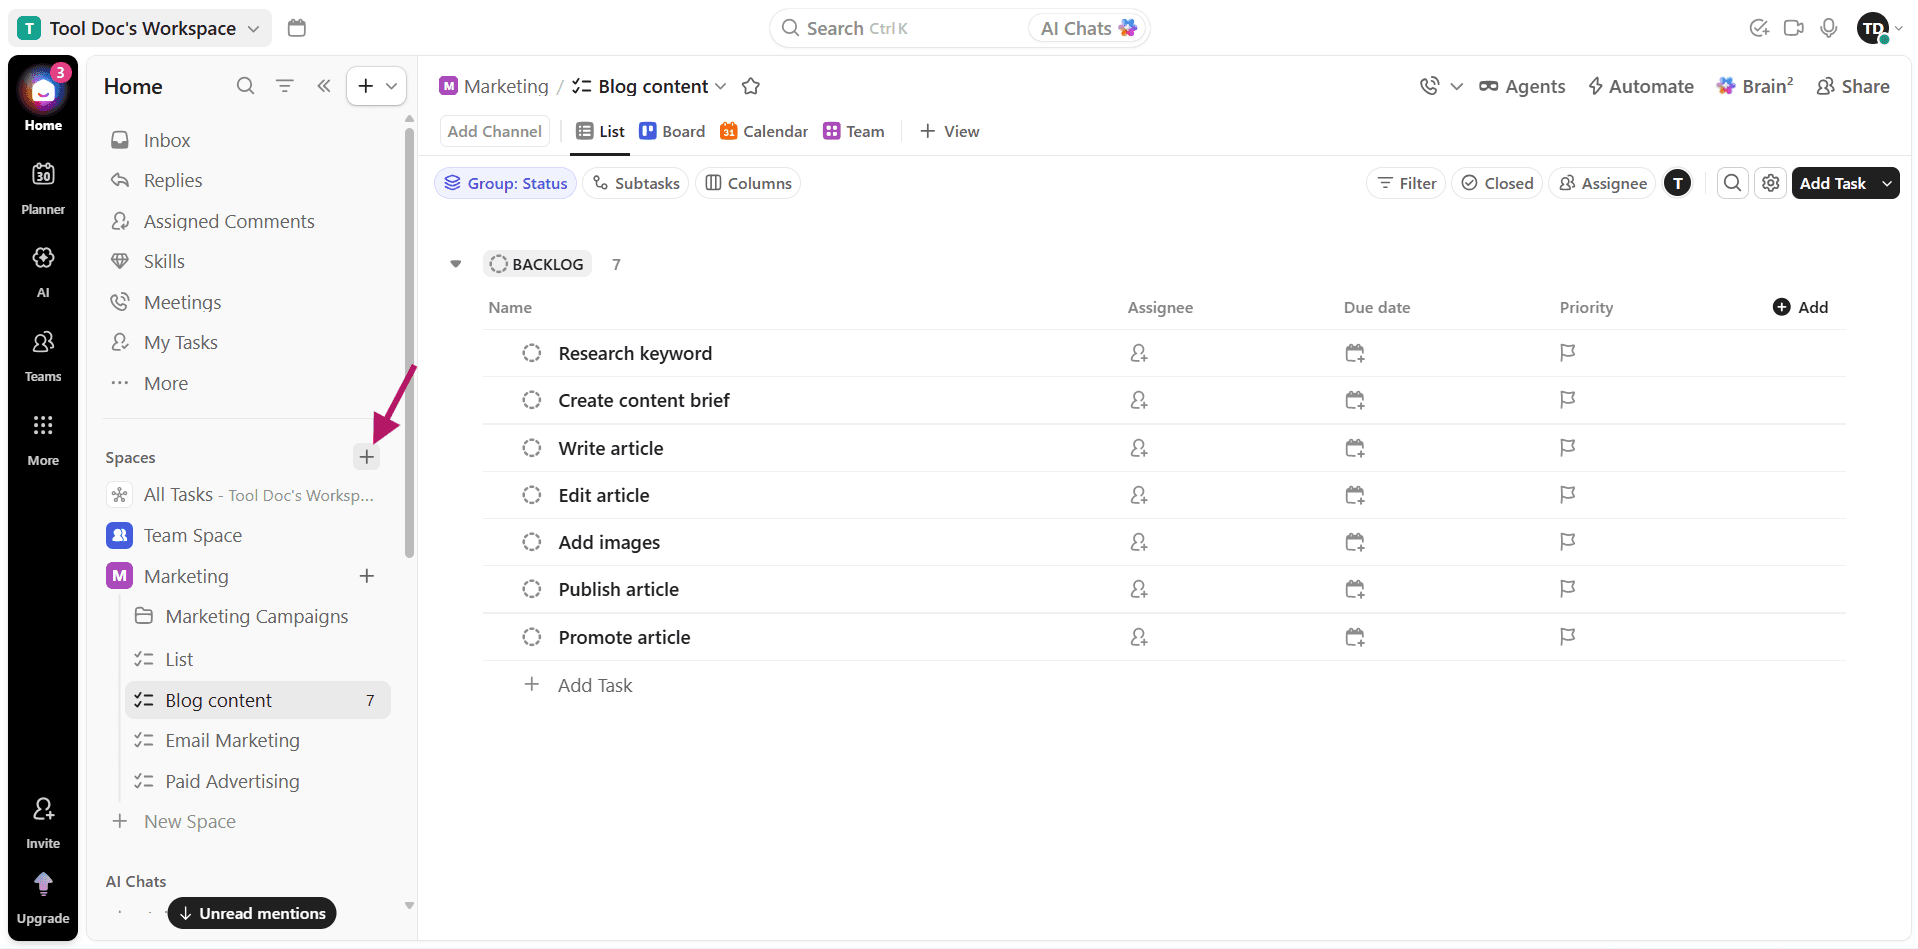
If you're following along for a business, I'd recommend starting with one of these:
Operations
Marketing
Client Projects
Sales
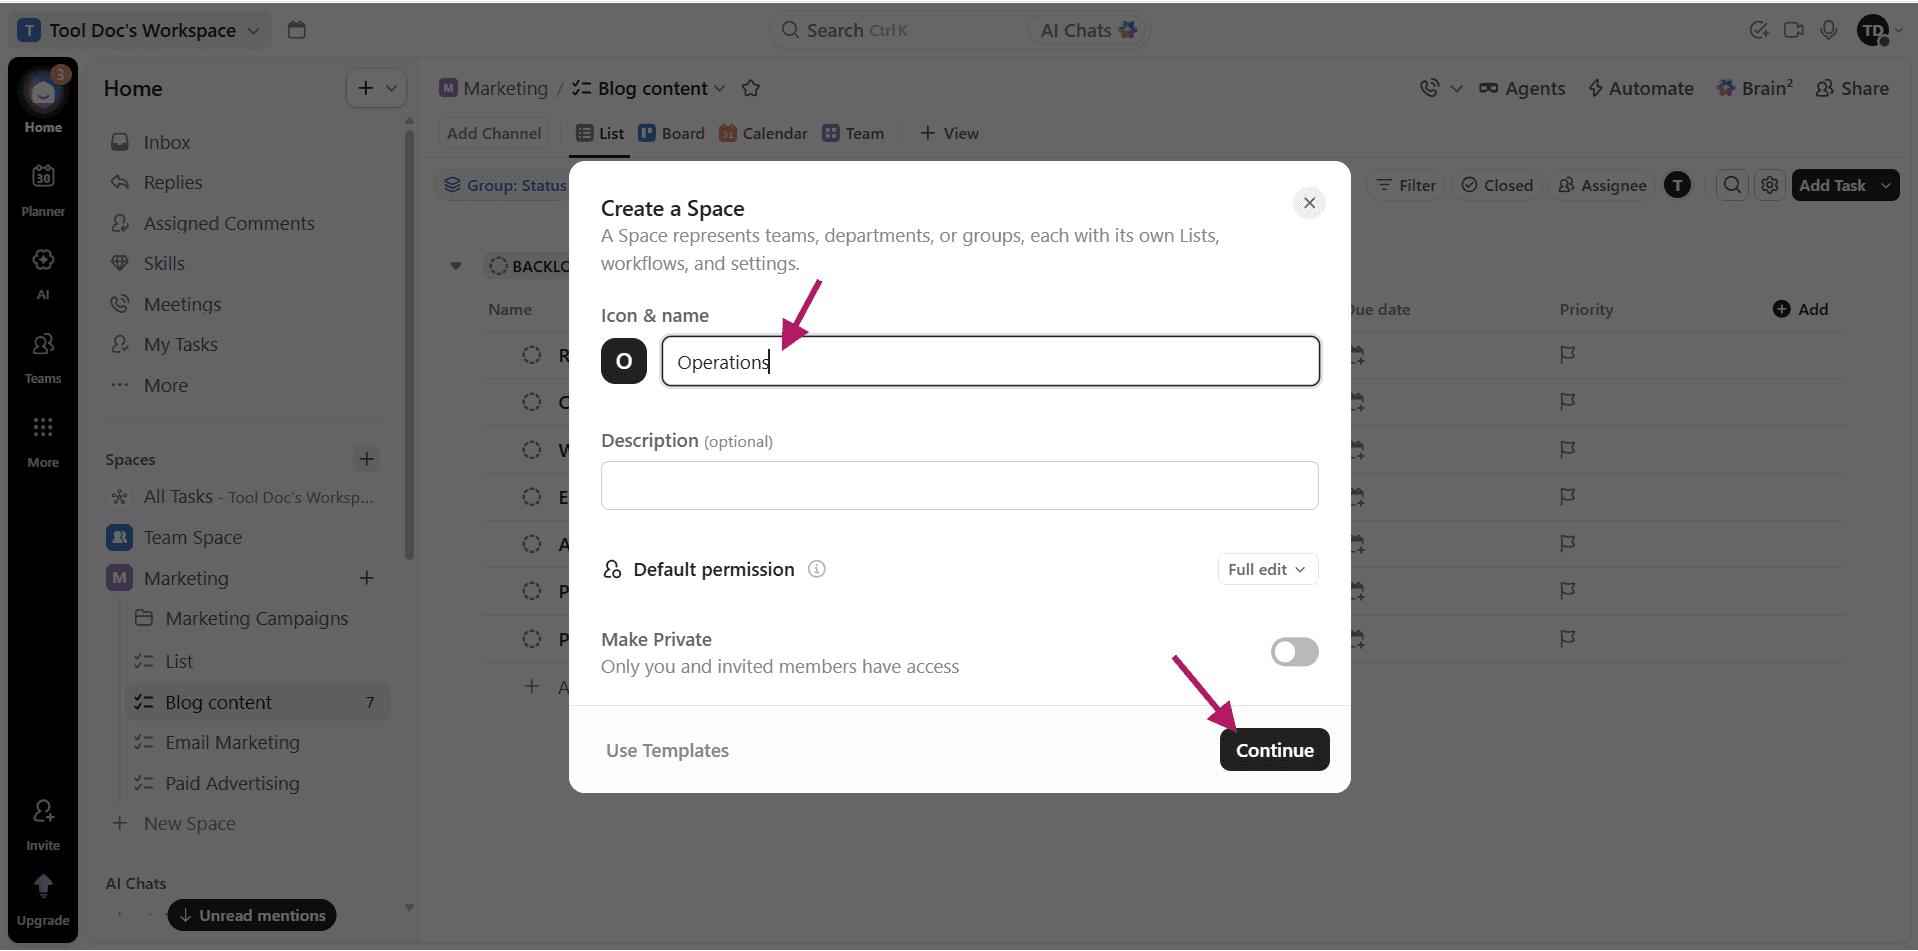
Choose the area of your business that needs the most organization.
Don't create ten Spaces immediately.
That's one of the easiest ways to make ClickUp confusing.
Start with one.
Once you understand how the system works, you can expand your Workspace.
Step 3: Create Your First List
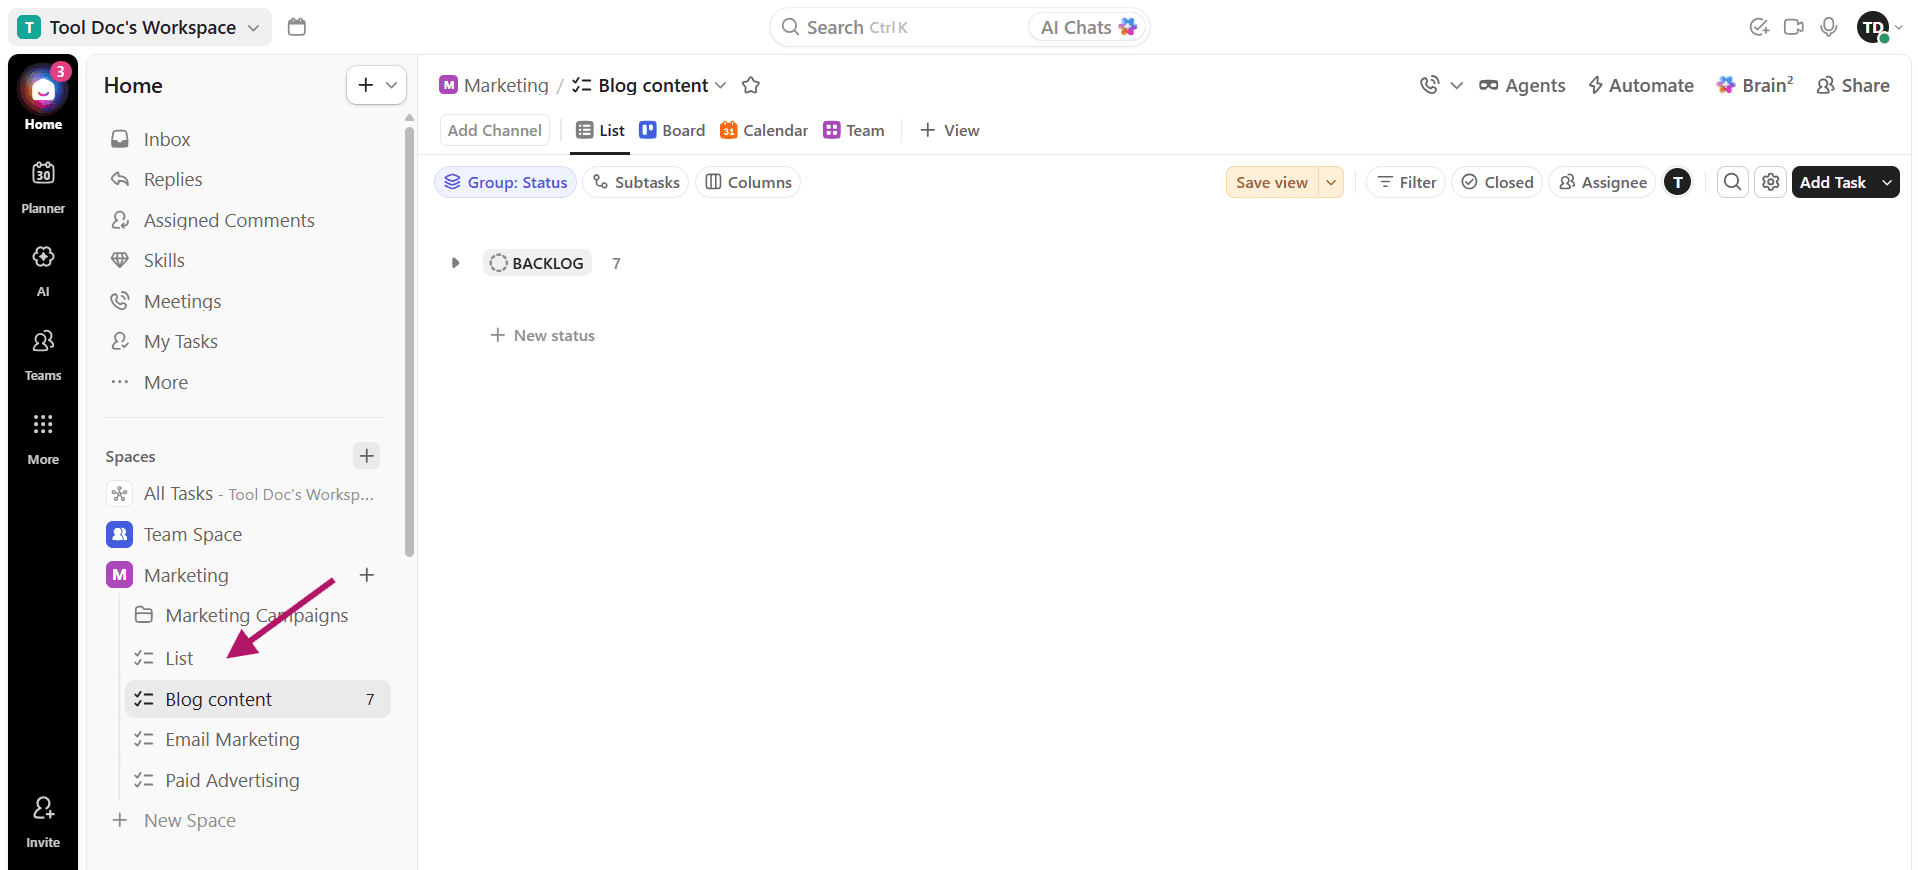
After creating your Space, create a List for a specific type of work.
For example, if you created a Marketing Space, you might create:
Content Calendar
This List could contain every piece of content your team plans to create.
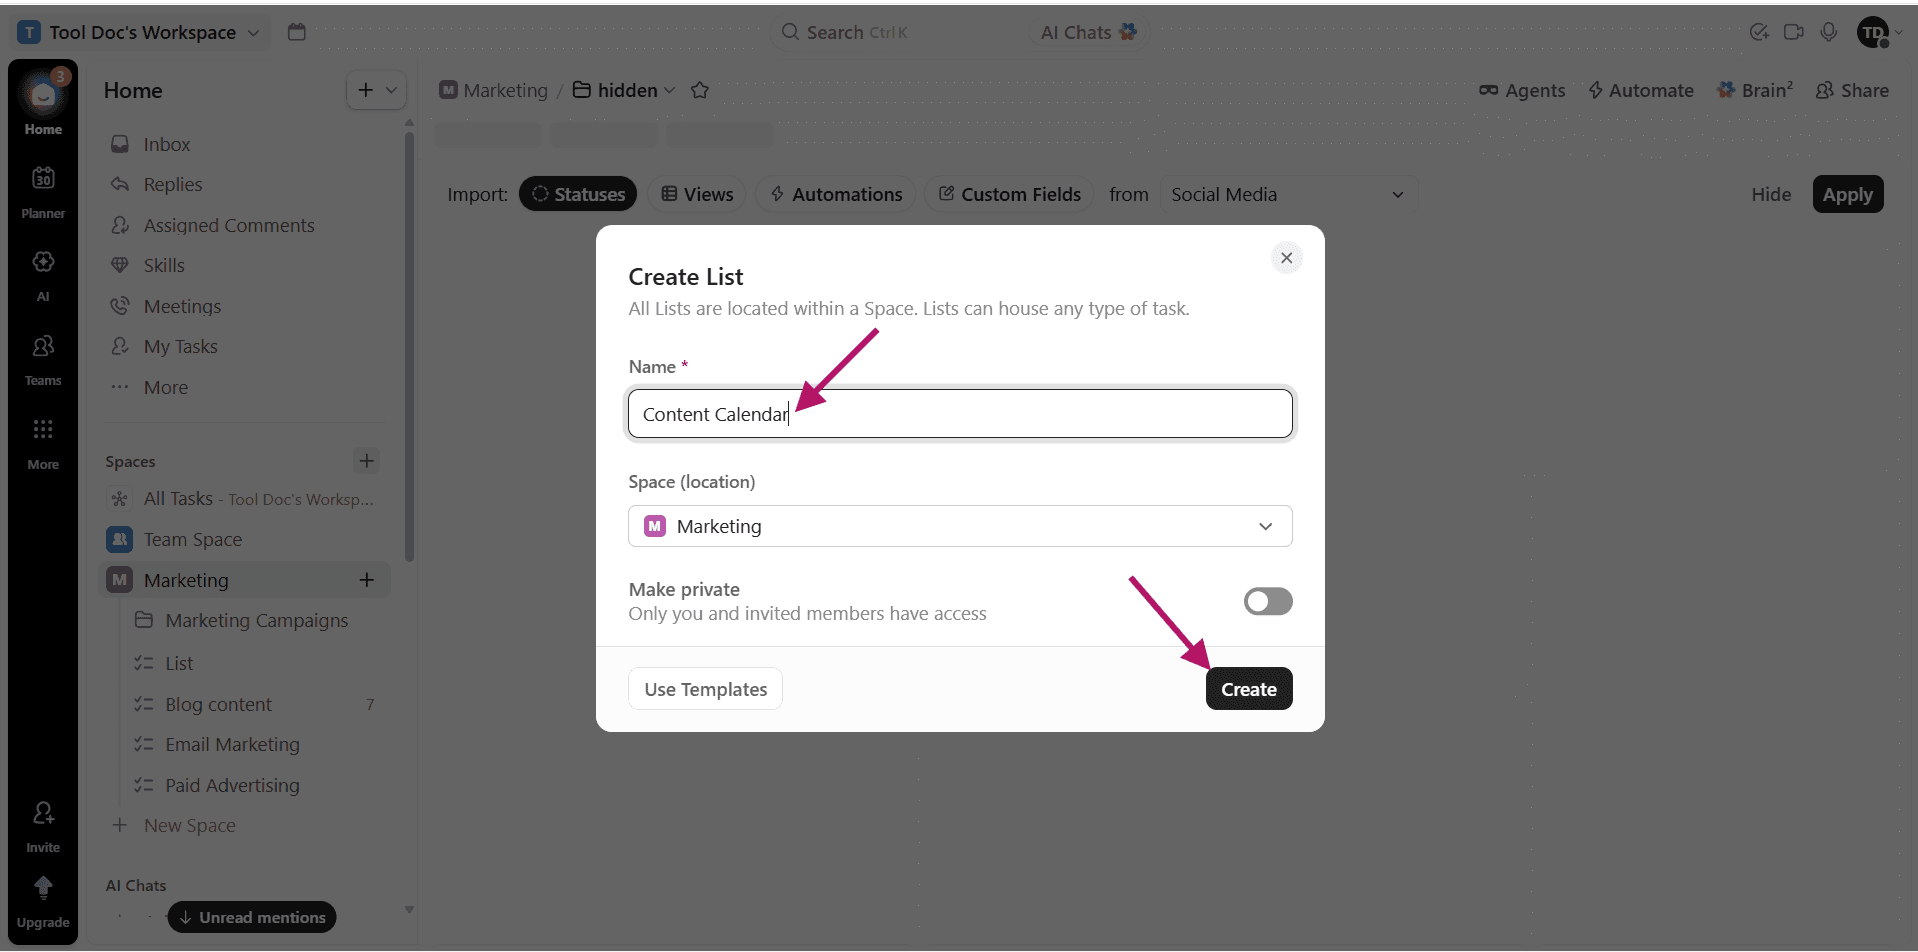
Each item becomes a task.
For example:
Write January Blog Post
Create YouTube Video
Publish LinkedIn Post
Send Email Newsletter
You can then assign each task to a team member and give it a deadline.
This is much easier to manage than keeping everything in a spreadsheet.
Step 4: Create Your First Task
Now let's create a task.
Click New Task and give it a clear name.
For example:
Write ClickUp Tutorial
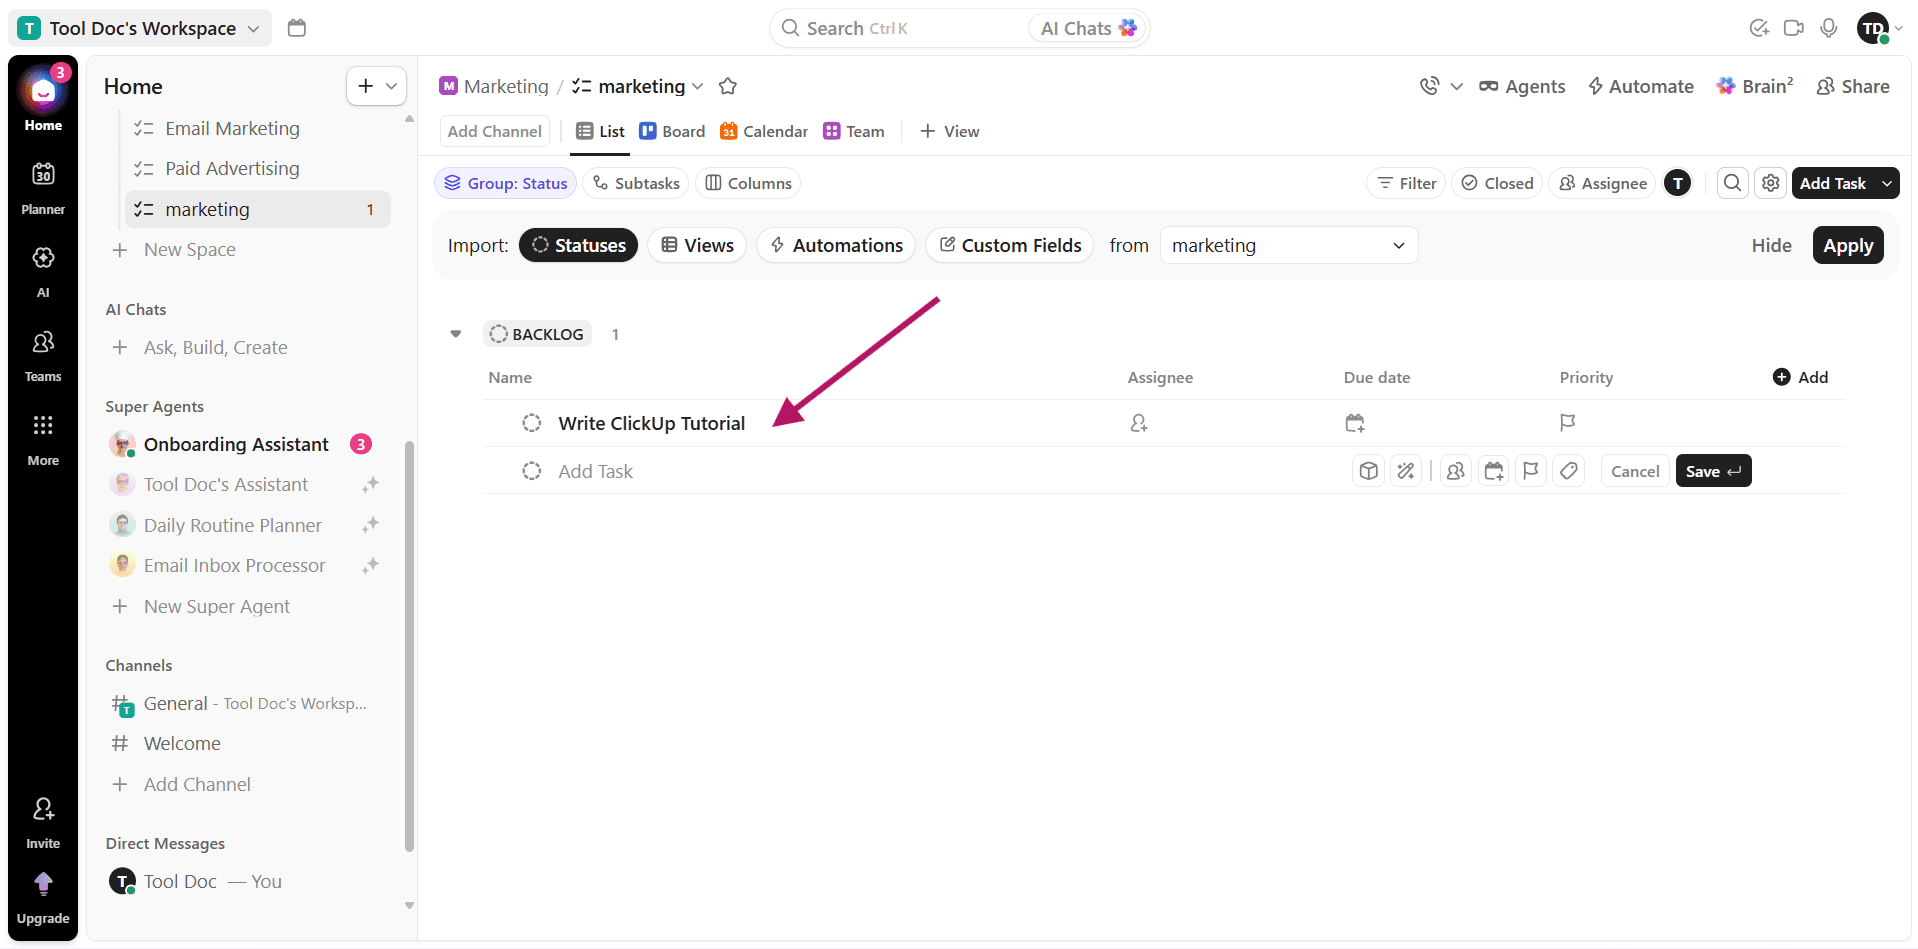
Avoid vague task names such as:
Content
or
Work on Blog
A good task name should tell the person exactly what needs to be done.
You can then add a description explaining the requirements.
For example:
Task: Write ClickUp Tutorial
Description: Create a beginner-friendly tutorial explaining how to set up ClickUp, organize projects, assign tasks, and use automations.
The clearer the task, the less time your team will spend asking questions.
Step 5: Assign the Task
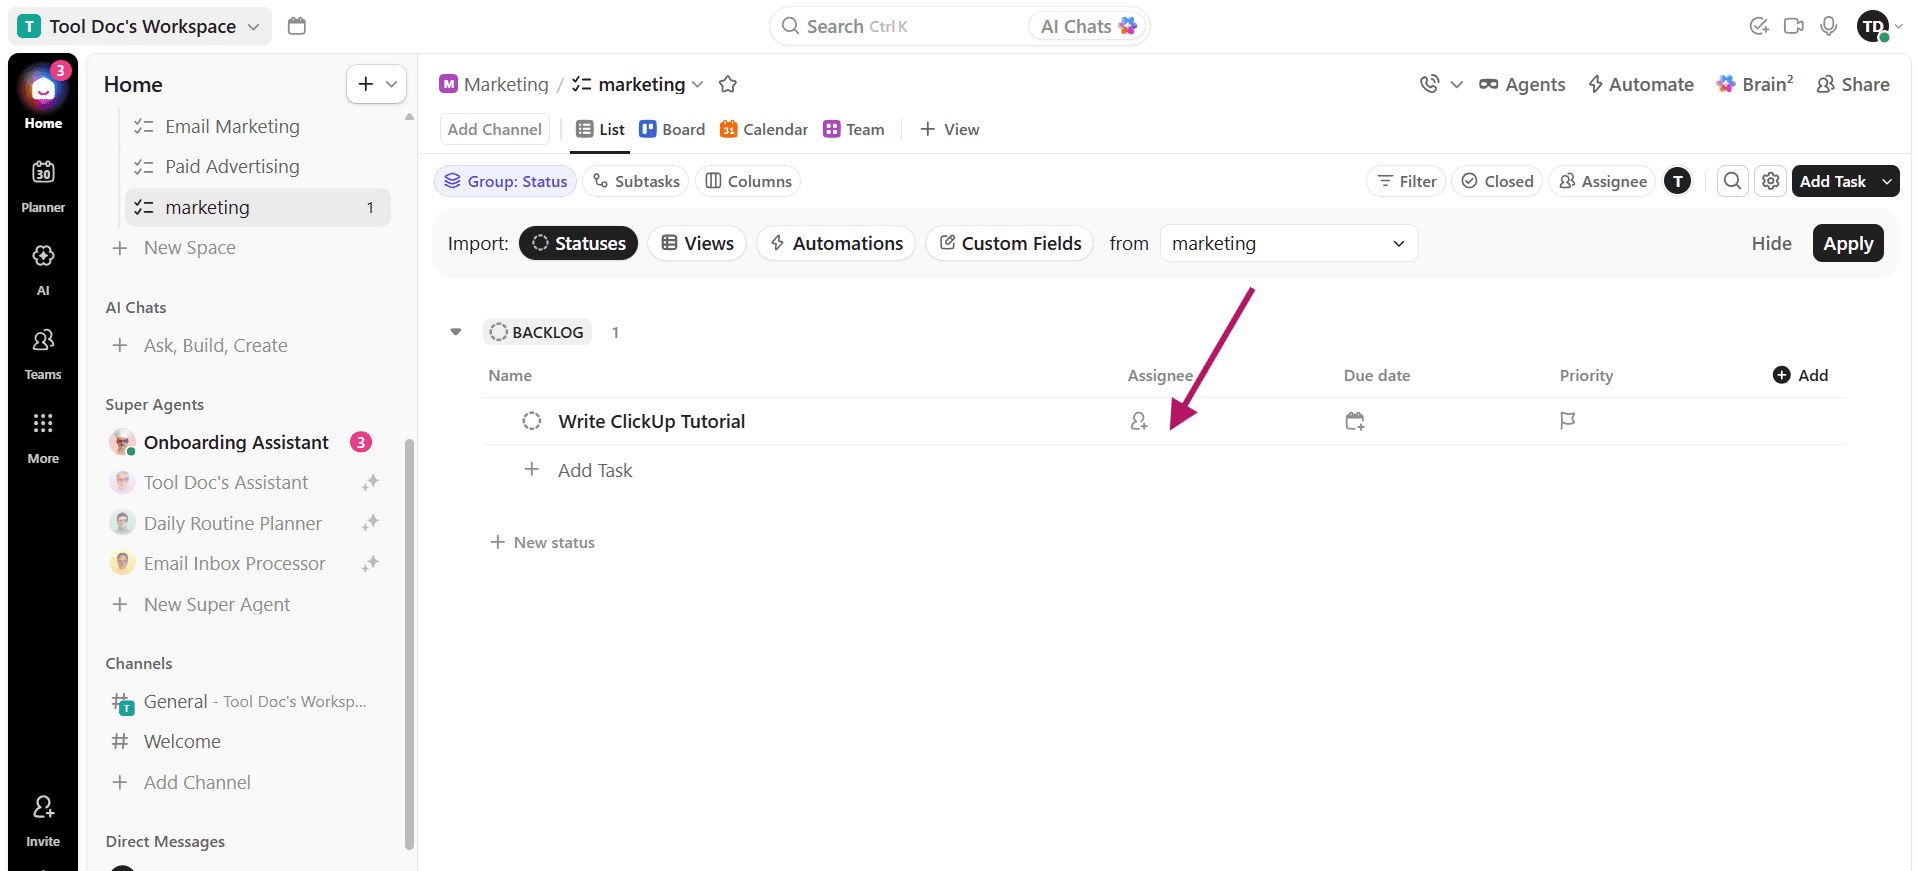
Once you've created the task, assign it to the person responsible for completing it.
For example:
Assignee: Sarah

Now everyone knows who owns the work.
This is important because tasks without clear ownership often become tasks that nobody completes.
If you're working alone, you can assign tasks to yourself.
For teams, make sure every important task has a clear owner.
Step 6: Add a Due Date
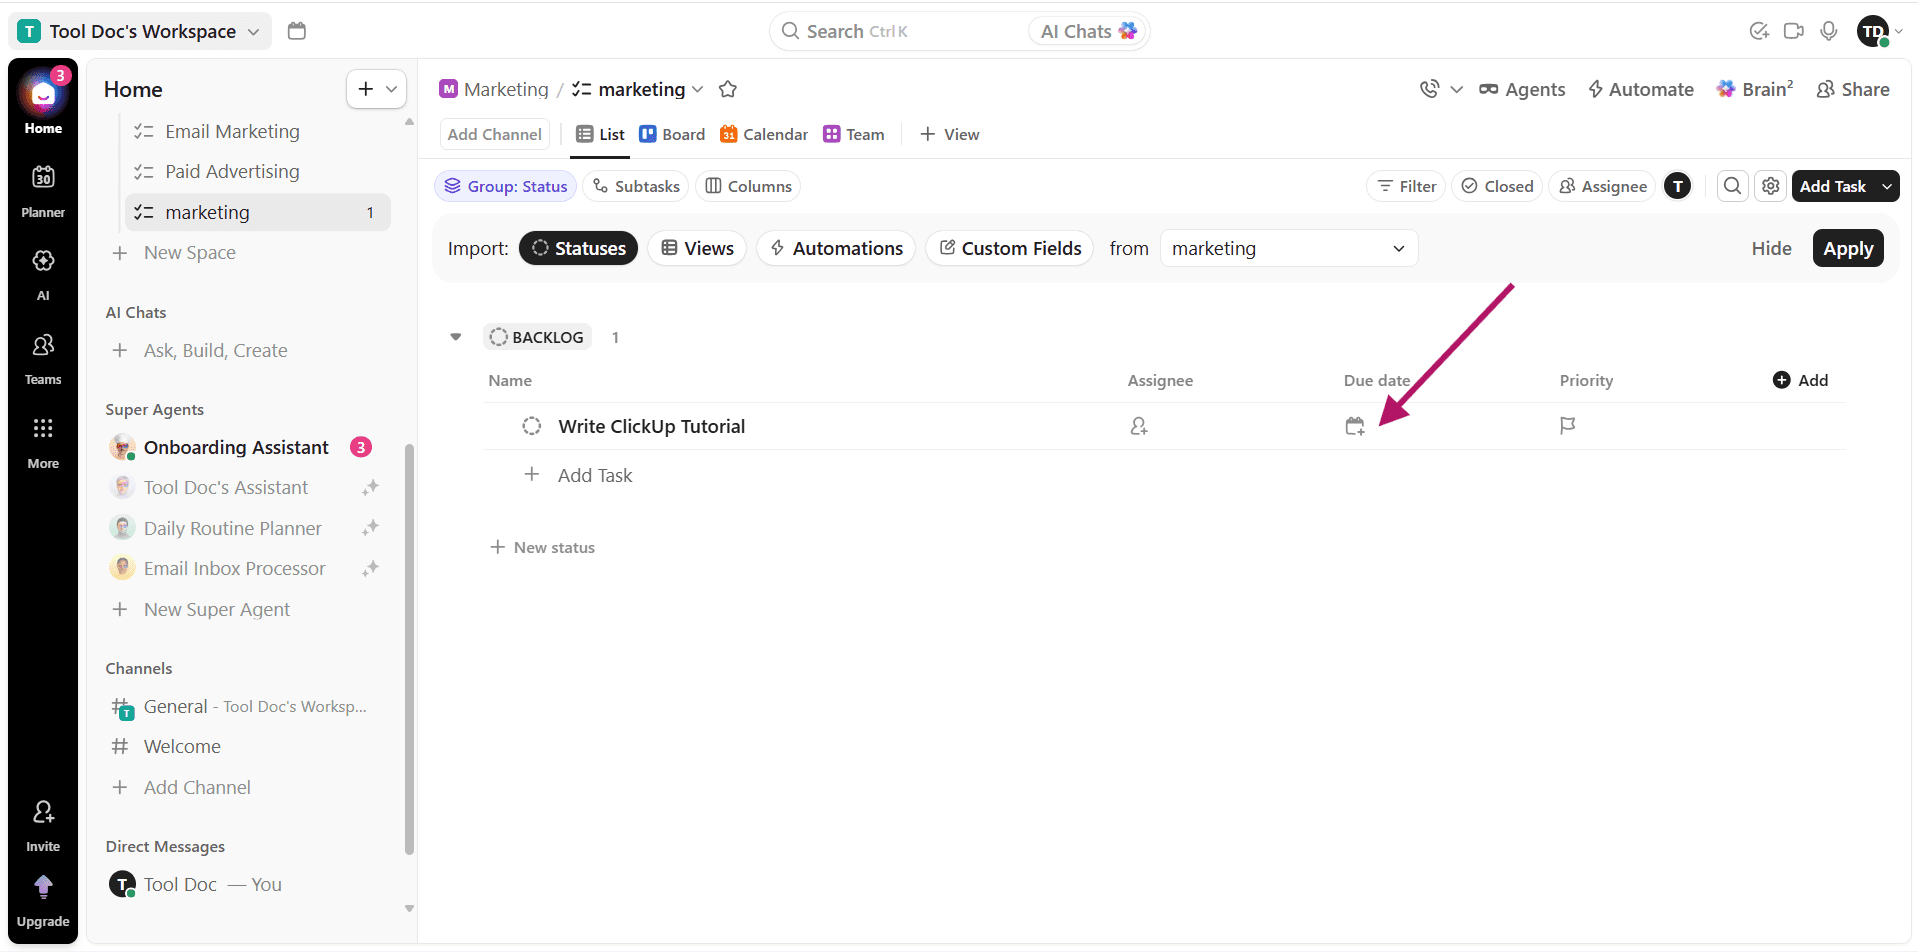
Next, set a deadline.
For example:
Due Date: July 30
A due date helps your team understand when the work needs to be completed.
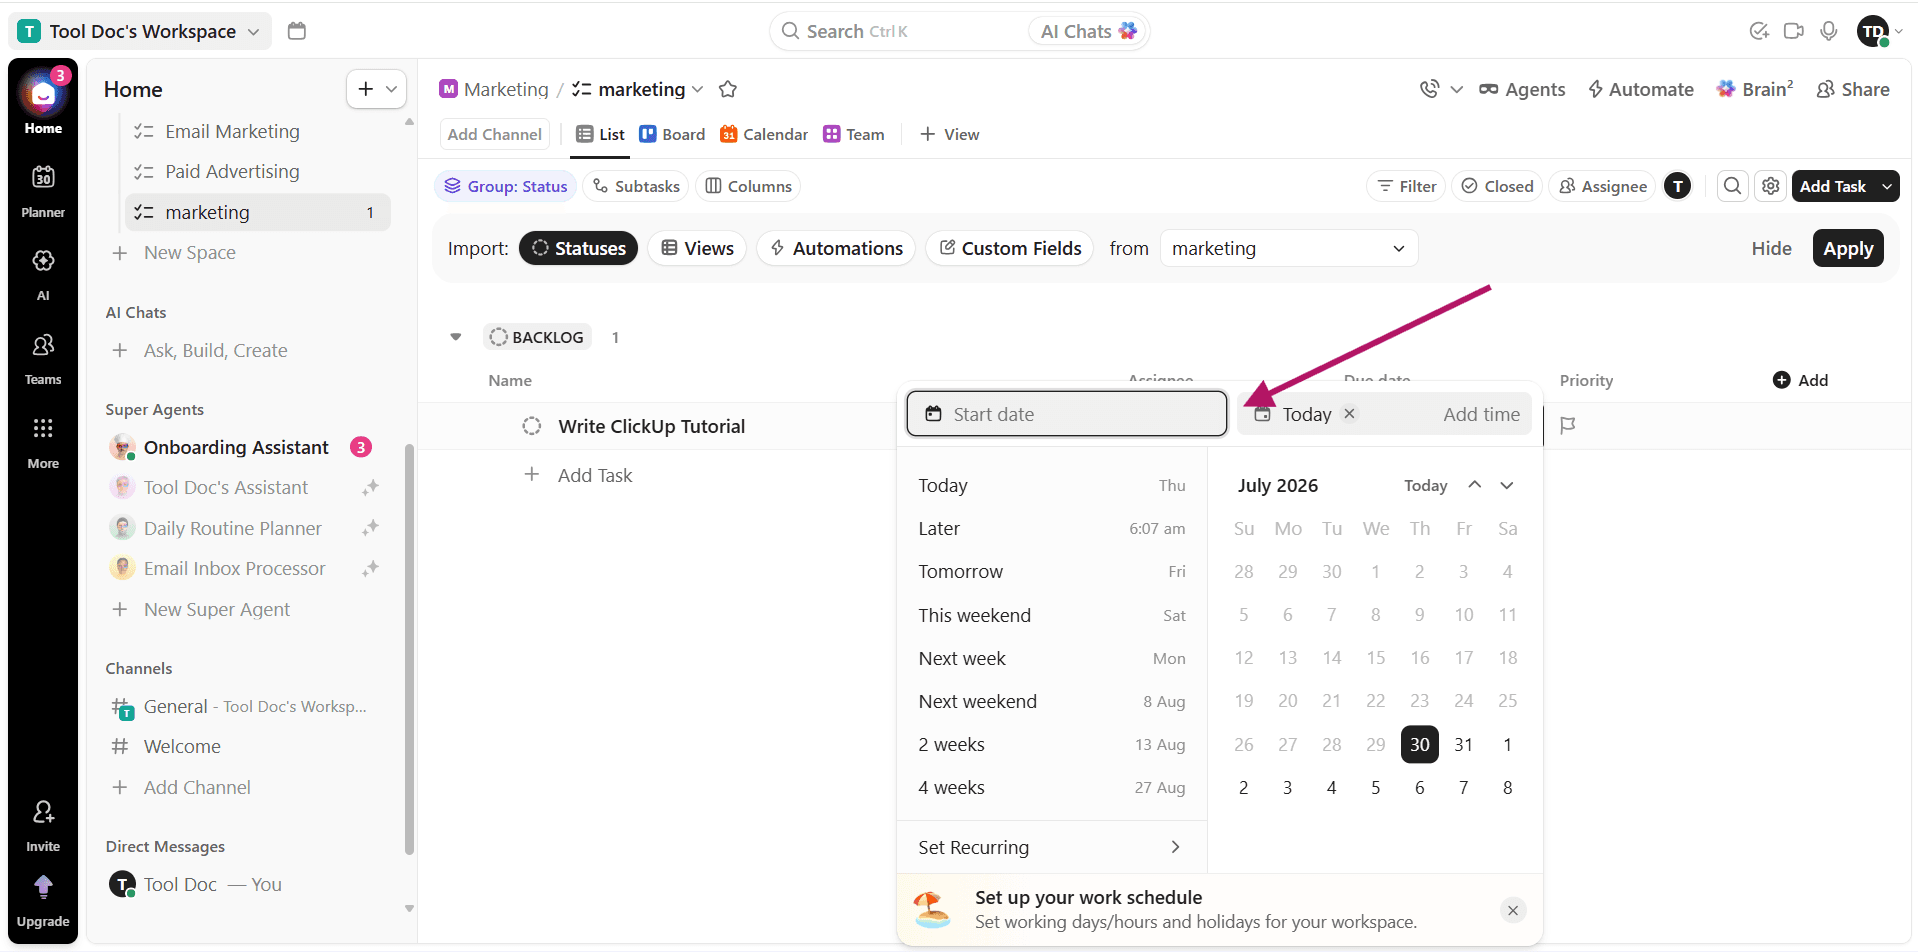
You can also use ClickUp's calendar and timeline views to see how deadlines are distributed across your projects.
When assigning deadlines, try to be realistic.
If everything is marked as urgent, nothing is truly urgent.
Use deadlines to prioritize work rather than create unnecessary pressure.
Step 7: Set Task Priorities
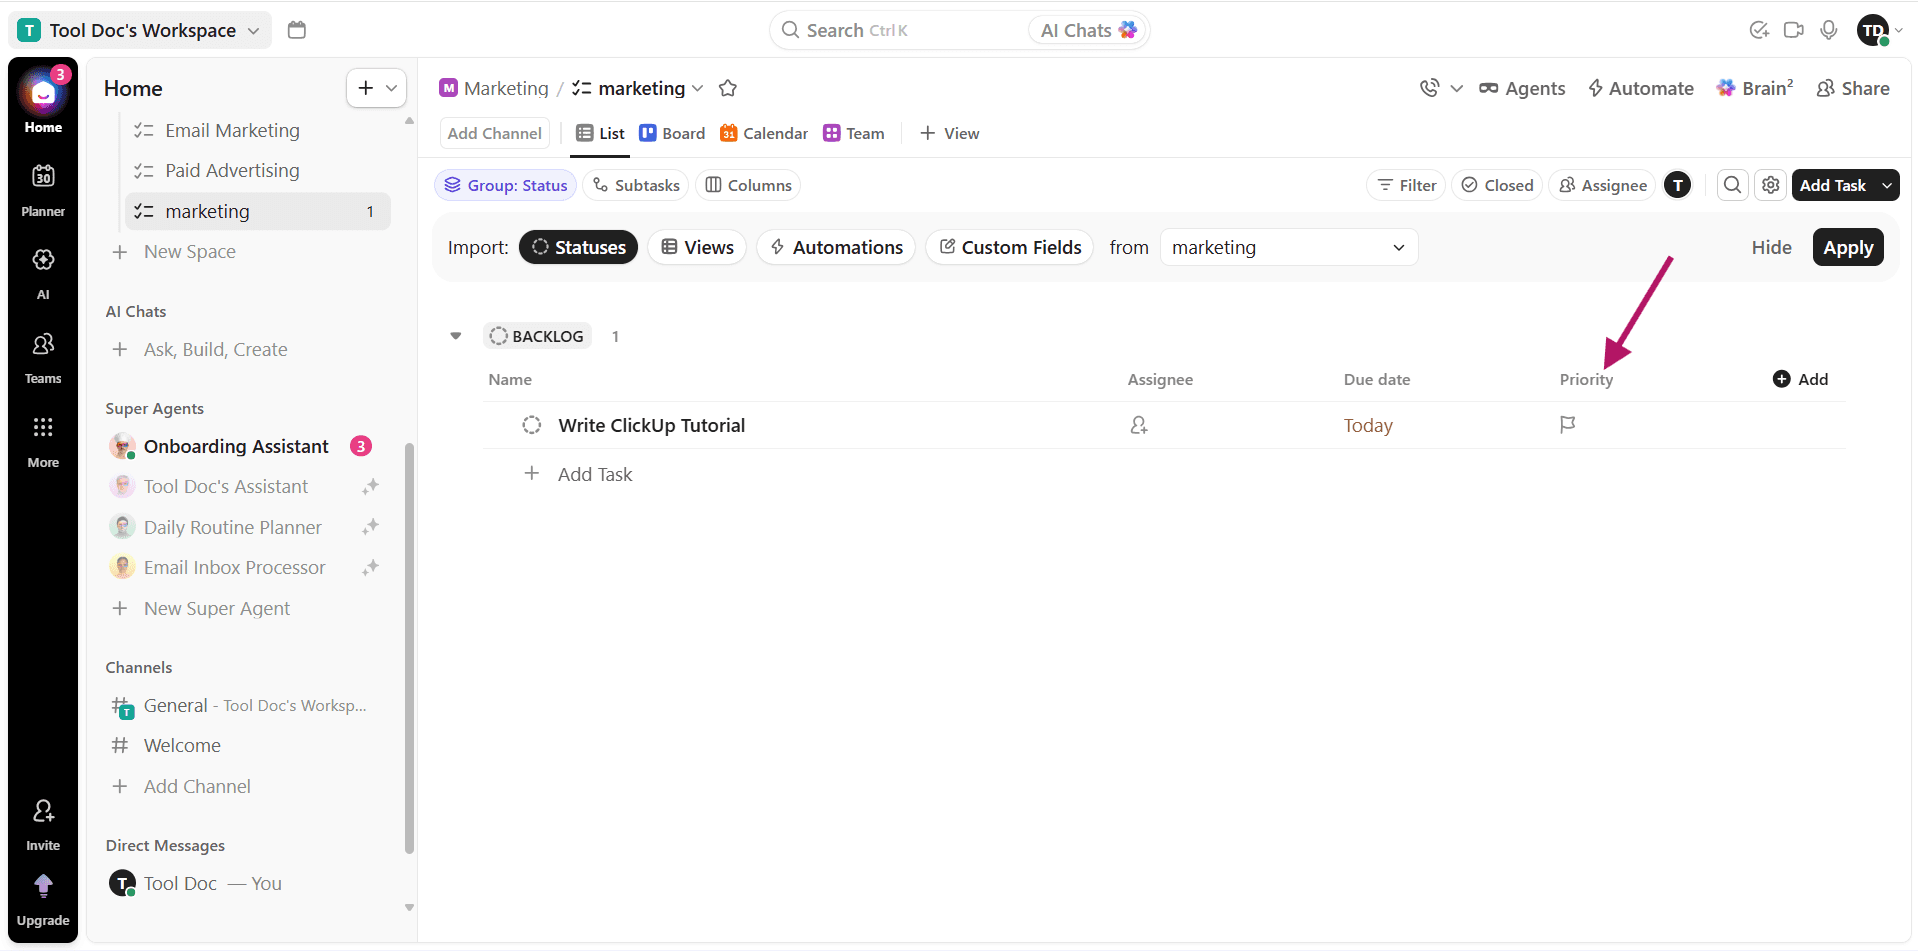
ClickUp allows you to prioritize tasks.
Depending on your workflow, you might use priorities such as:
Urgent
High
Normal
Low
For example:
Urgent: Fix a critical website problem.
High: Complete a client presentation.
Normal: Write next month's blog post.
Low: Organize old project files.

Priorities help your team decide what needs attention first.
Don't mark every task as urgent.
If you do, the priority system stops being useful.
Step 8: Add Statuses

Statuses help you track the progress of your work.
A simple workflow might include:
To Do
In Progress
Review
Completed
For a client project, you might use:
Planning
In Progress
Internal Review
Client Review
Revisions
Approved
Completed
Your status workflow should match the way your business actually works.
Keep it simple at first.
You can always add more statuses later.
Step 9: Add Subtasks
If your task requires multiple steps, create subtasks.
For example:
Main Task: Publish Blog Article
Subtasks:
Complete keyword research
Write article
Edit article
Add images
Optimize SEO
Publish
Share on social media
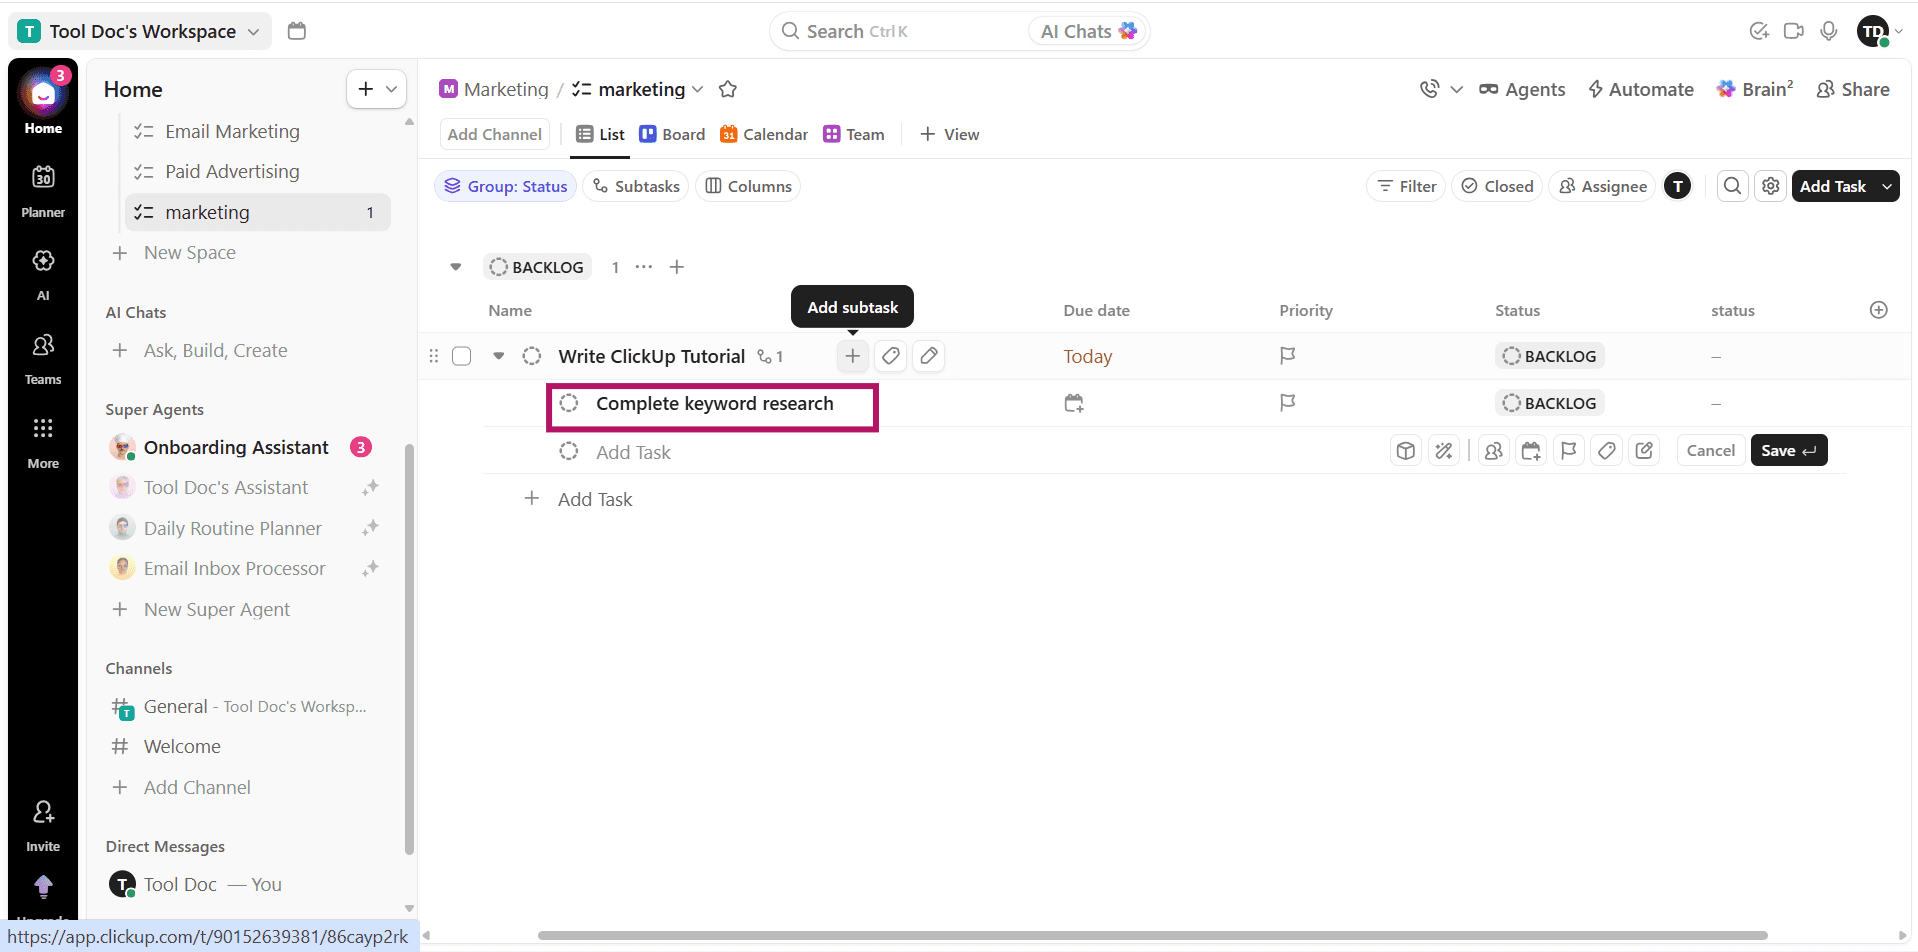
This gives your team a clear checklist and makes progress easier to track.
For larger projects, you can also use dependencies to indicate that one task needs to be completed before another can begin.
Step 10: Add Comments and Attachments
ClickUp tasks can also act as a central location for communication.
You can add:
Comments
Mentions
Documents
Images
Files
Links
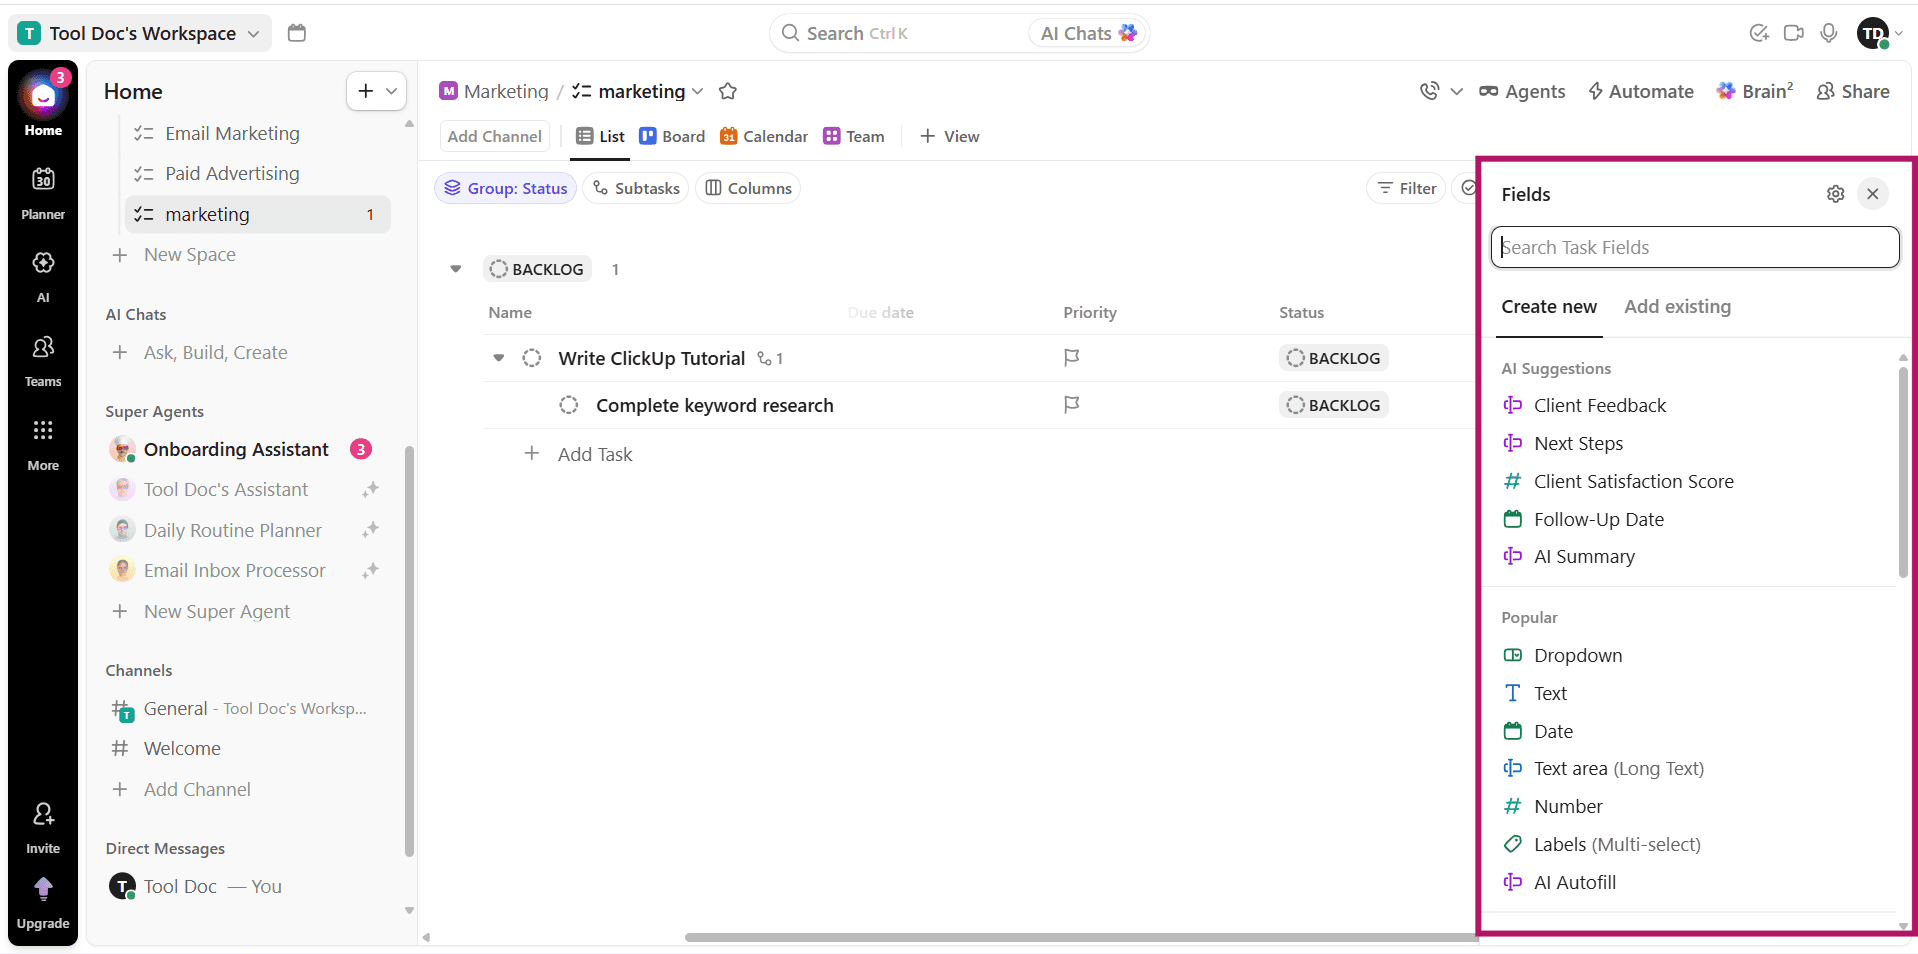
This is useful because the information stays connected to the task.
Imagine you're working on a client website.
Instead of sending an email saying:
"Please change the homepage headline."
You can leave the request directly on the relevant task.
Now the instruction, conversation, and work are all connected.
This reduces the chance of important information getting lost in email or chat.
Step 11: Choose the Right ClickUp View
One of ClickUp's biggest strengths is that you don't have to view your work in only one format.
Depending on the project, you can use different views.
List View
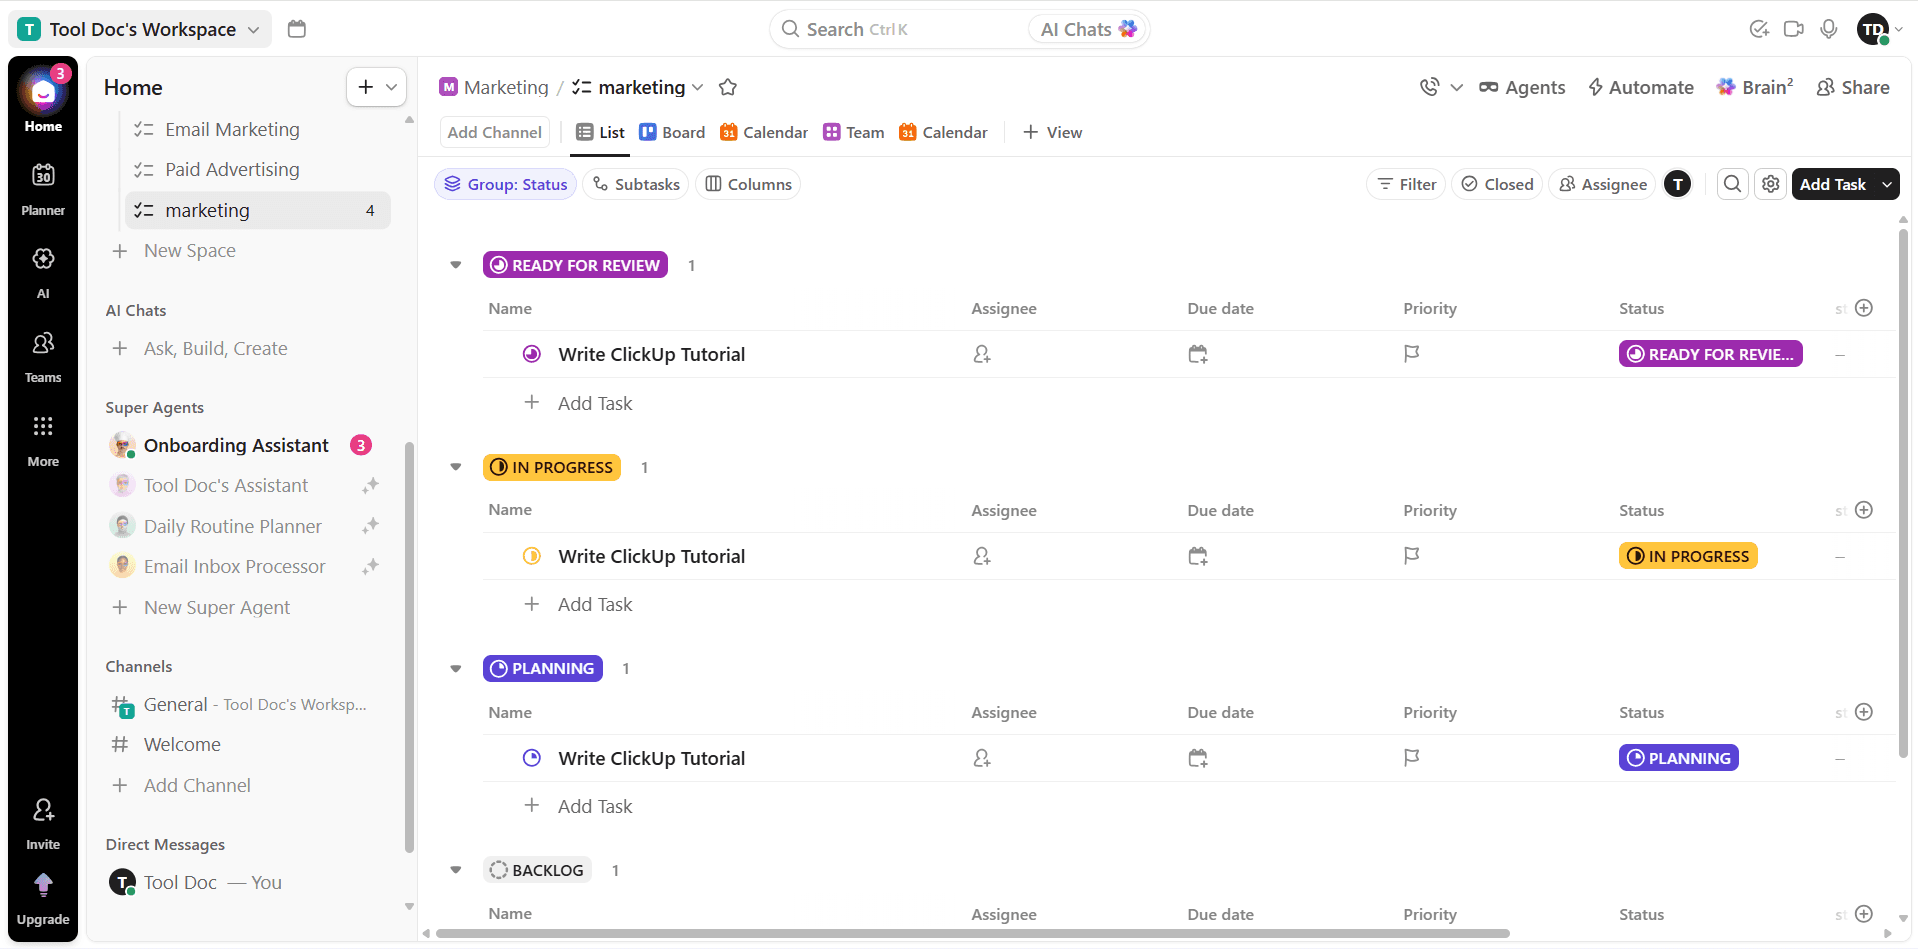
Best for managing tasks in a straightforward list.
This is usually the best starting point for beginners.
Board View
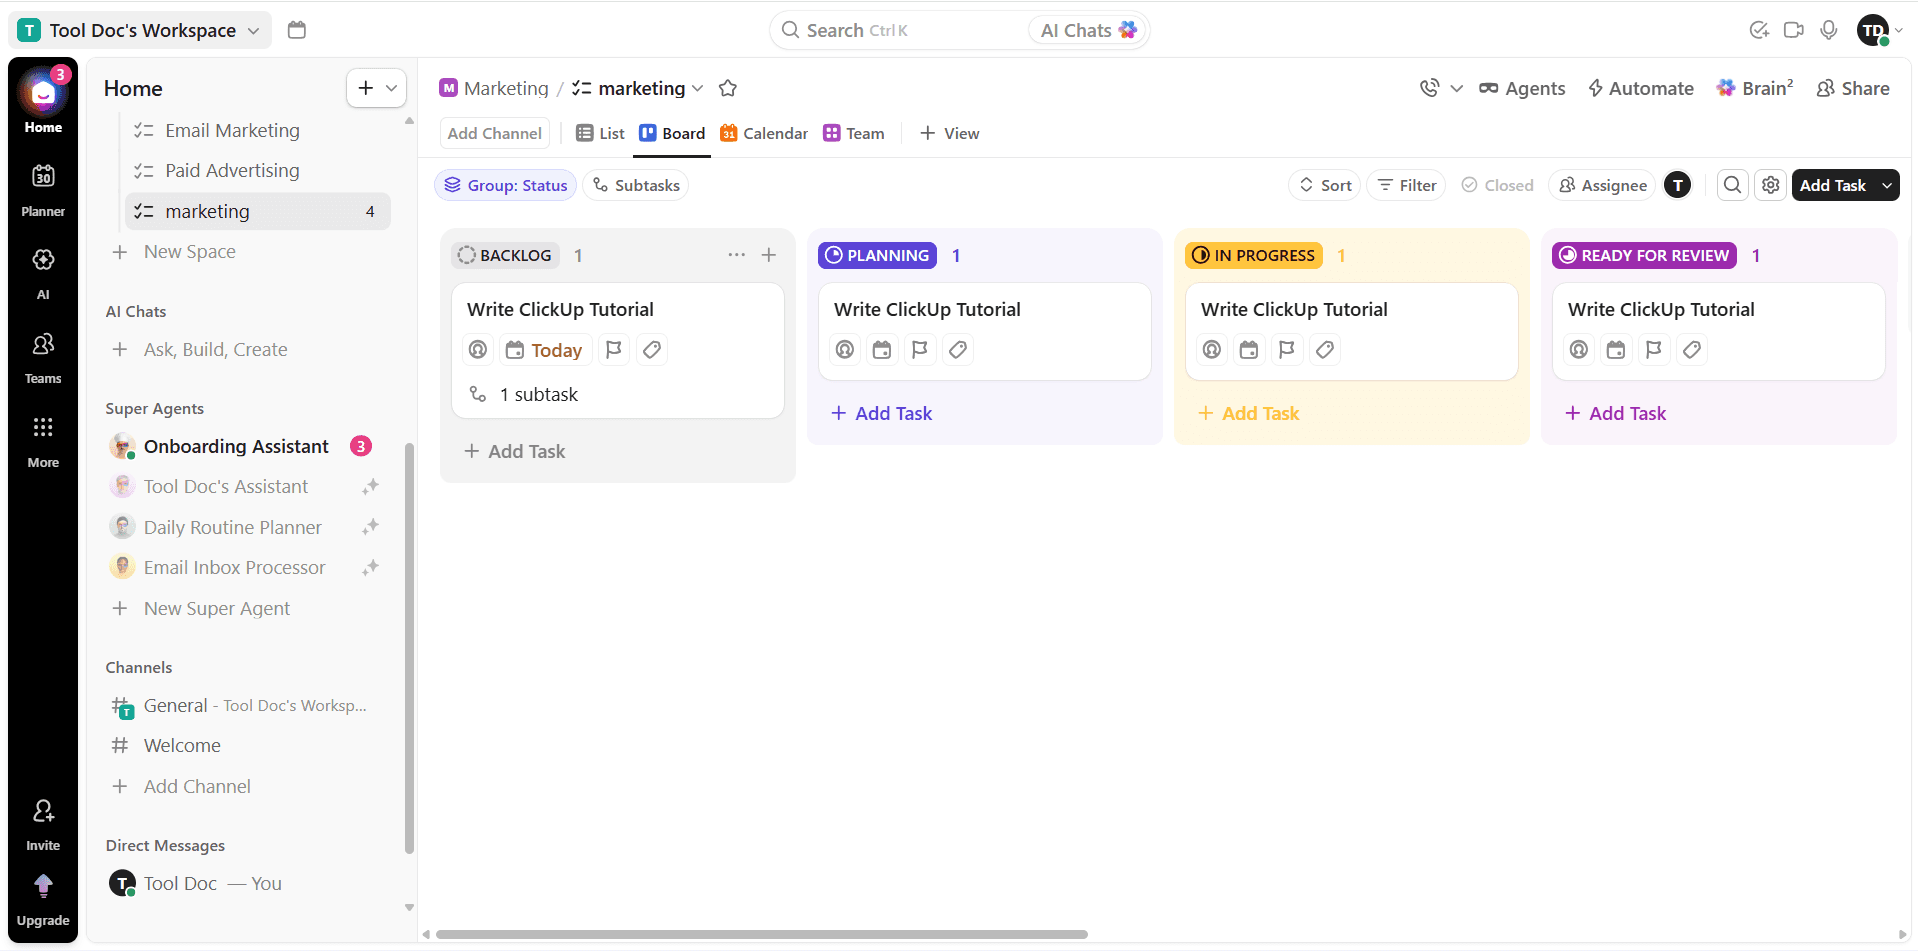
Best for visual workflows.
Tasks appear as cards that move through different stages.
For example:
To Do → In Progress → Review → Completed
This is particularly useful for content teams and Agile workflows.
Calendar View
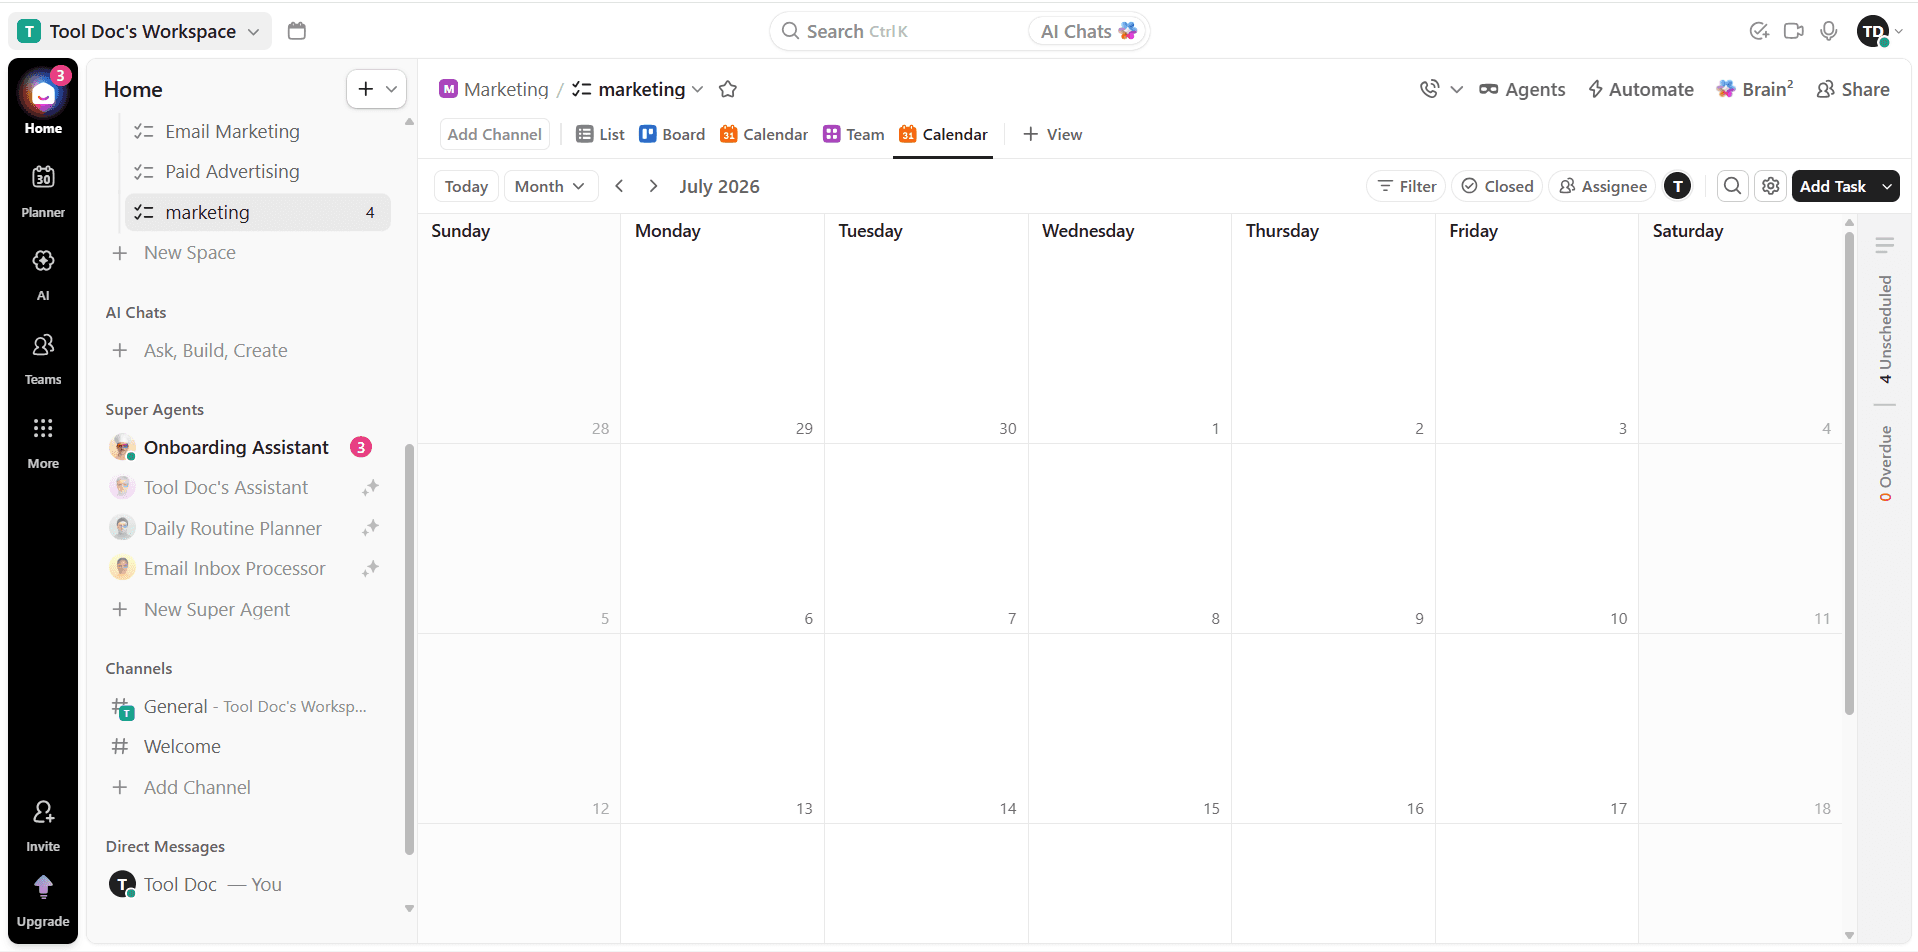
Best for deadline-driven work.
It's useful for:
Content calendars
Marketing campaigns
Events
Publishing schedules
Gantt View
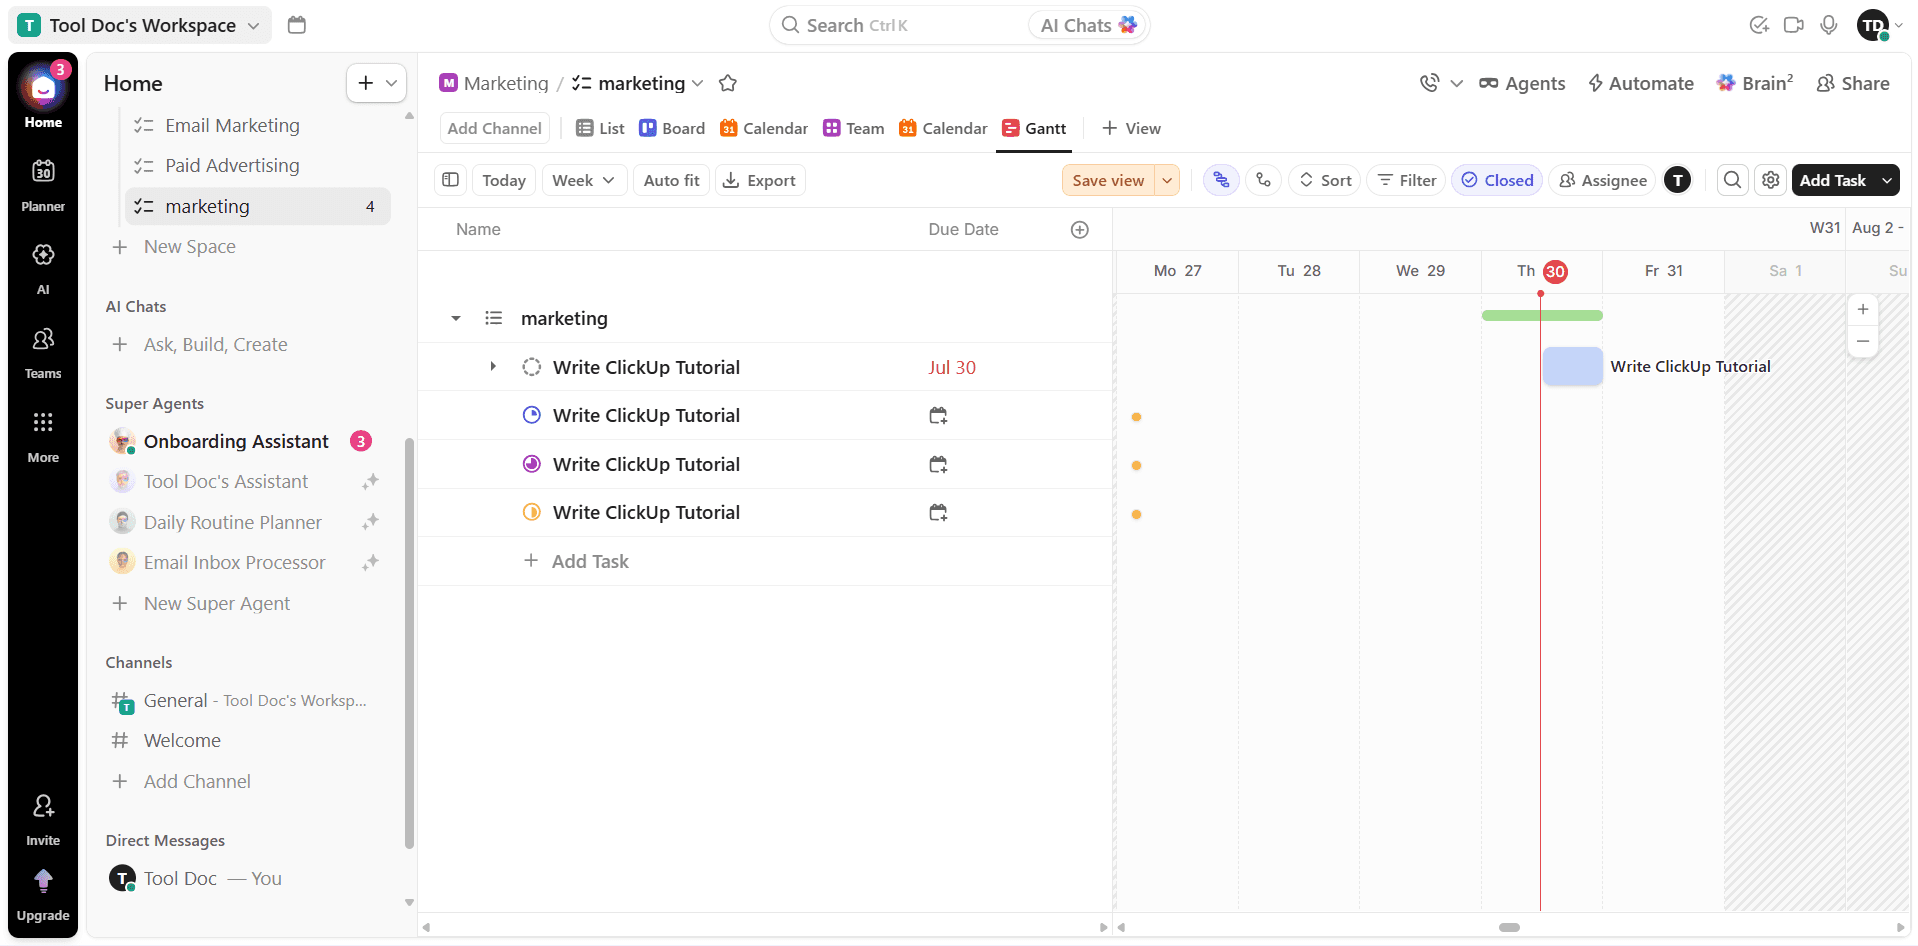
Best for complex projects with dependencies and timelines.
It helps you visualize how different tasks relate to each other.
Timeline View
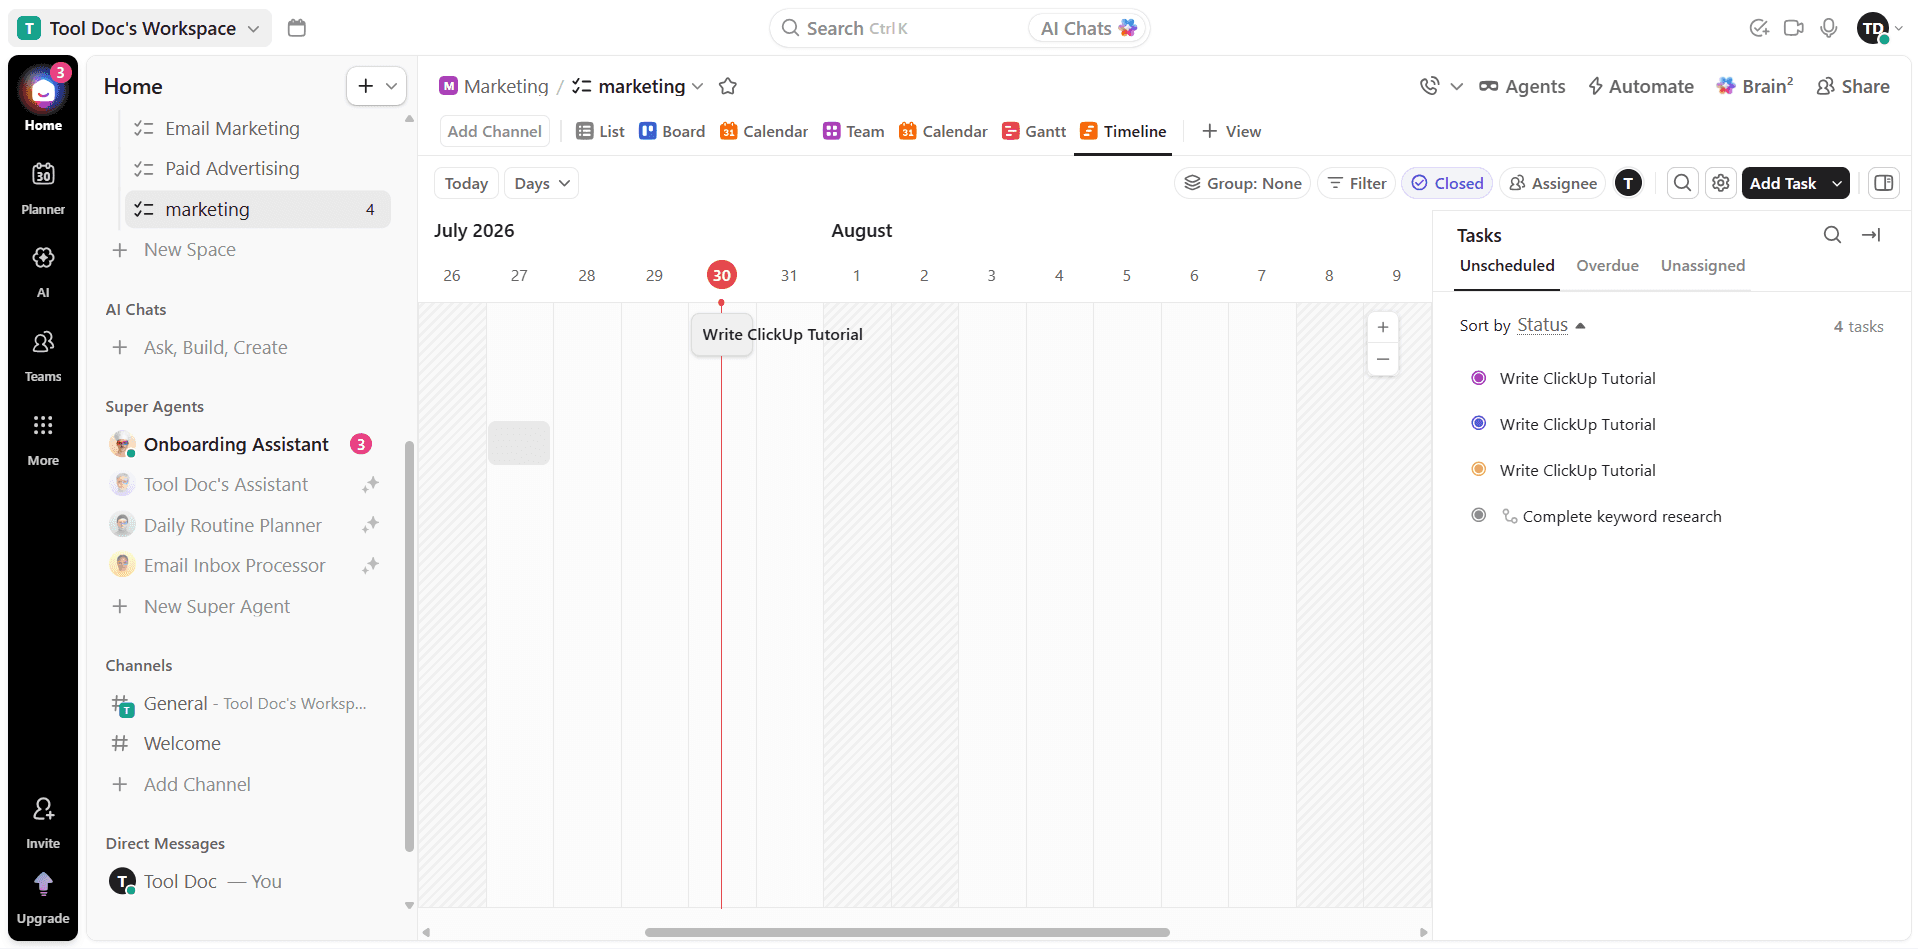
Useful for seeing when projects and tasks are scheduled over time.
Workload View

Helpful for managers who need to understand how much work each team member has.
If one person has 30 tasks while another has three, the workload view can make that imbalance obvious.
For beginners, I'd recommend starting with List View and adding other views only when you actually need them.
Step 12: Create a Real Project in ClickUp
Now that you understand Spaces, Folders, Lists, and Tasks, it's time to put everything together.
Let's create a simple project that you could actually use in a business.
Imagine you're launching a new website.
You could organize it like this:
Workspace: Your Business
Space: Marketing
Folder: Website Launch
List: Website Redesign
Inside the List, you could create tasks such as:
Define website goals
Research competitors
Create sitemap
Write website copy
Design homepage
Design inner pages
Develop website
Add analytics
Test mobile responsiveness
Perform SEO checks
Launch website
Each task can have its own:
Assignee
Due date
Priority
Status
Subtasks
Comments
Attachments
Now your website project isn't just a list of ideas.
It's a structured workflow that your team can actually execute.
This is where ClickUp starts becoming more valuable than a simple to-do list.
Step 13: Use Task Dependencies
Some tasks can't begin until another task is finished.
For example:
Write Website Copy
↓
Design Homepage
↓
Develop Website
↓
Test Website
↓
Launch
You can't properly design the final website if the content isn't ready.
And you shouldn't launch the website before testing it.
ClickUp allows you to create dependencies between tasks so your team can understand which work needs to happen first.
This is particularly useful for:
Website projects
Product launches
Marketing campaigns
Software development
Client projects
Event planning
Dependencies help prevent teams from working out of sequence.
Step 14: Create Recurring Tasks
Many businesses have work that happens repeatedly.
For example:
Weekly team meetings
Monthly reports
Weekly social media posts
Monthly invoices
Regular website maintenance
Employee check-ins
Instead of creating the same task manually every time, you can set it up as a recurring task.
For example:
Task: Send Monthly Performance Report
Repeat: Every month
Now ClickUp can automatically create the task according to your schedule.
This is a small feature, but it can eliminate a surprising amount of repetitive administrative work.
Step 15: Build Your First Automation
Once you're comfortable with tasks and statuses, you can start automating your workflow.
Let's use a simple example.
Imagine your content team has this workflow:
To Do
↓
Writing
↓
Editing
↓
Published
You could create an automation that triggers when a task moves to Editing.
The automation might:
Assign the task to an editor
Change the priority
Notify the editor
Add a due date
This means the workflow can continue automatically without someone manually managing every step.
Another example:
When a task is marked Completed, ClickUp could automatically notify the project manager.
Or when a new client project is created, ClickUp could automatically create a standard set of onboarding tasks.
These small automations can save significant time when repeated across hundreds of tasks.
Step 16: Create a ClickUp Dashboard
Once your business starts managing more projects, you'll need a way to see the bigger picture.
That's where ClickUp Dashboards come in.
A dashboard gives you a visual overview of your work.
Depending on your needs, you might track:
Tasks completed
Overdue tasks
Projects in progress
Team workload
Project status
Time tracked
Upcoming deadlines
For example, a business owner might create a dashboard showing:
Active Projects: 12
Overdue Tasks: 7
Completed This Week: 46
Projects At Risk: 2
This gives you a quick snapshot of what's happening without opening every project individually.
Dashboards are particularly useful for managers who need to make decisions based on the current state of their business.
Step 17: Use ClickUp Docs
ClickUp isn't just for tasks.
You can also create documents for information that your team needs to reference regularly.
For example, you might create a Doc called:
Company SOPs
Inside, you could document:
How to onboard a new client
How to publish a blog post
How to process invoices
How to handle customer support
How to launch a marketing campaign
You could also create:
Meeting notes
Project briefs
Product documentation
Training materials
Internal guidelines
The advantage is that your documentation can live alongside your projects and tasks.
For example, a task called Onboard New Client could be connected to a document explaining your company's onboarding process.
That way, team members don't have to ask the same questions repeatedly.
Step 18: Use ClickUp Forms
Forms are useful when you need to collect information and automatically turn it into work.
For example, a marketing agency could create a Client Request Form.
The client or team member could submit:
Request type
Description
Priority
Deadline
File attachments
Once submitted, the information can be turned into a ClickUp task.
This creates a simple workflow:
Request Submitted
↓
Task Created
↓
Task Assigned
↓
Work Completed
This is much more organized than receiving requests through random emails or messages.
Forms can be useful for:
Client requests
IT support
Marketing requests
Design requests
Employee onboarding
Internal task submissions
Step 19: Use ClickUp AI
ClickUp also includes AI capabilities that can help with everyday work.
Depending on your plan and available features, you can use AI to help with tasks such as:
Writing content
Summarizing information
Creating task descriptions
Generating ideas
Rewriting text
Creating project updates
Finding information
Turning discussions into actionable information
For example, imagine you've written a rough project update.
Instead of spending five minutes rewriting it, you can ask AI to make it clearer and more professional.
Or you might have a long project discussion and want a quick summary of the key points.
AI can help reduce some of this manual work.
However, I'd recommend treating AI as an assistant rather than an autopilot.
Always review important information before sending it to clients or using it to make business decisions.
Step 20: Create a Simple Client Management Workflow
One of the most useful ways to use ClickUp is to manage client projects.
Let's say you're running a digital marketing agency.
You could create:
Space: Client Work
Folder: Client A
List: Monthly Marketing
Then create tasks for:
Monthly strategy
Keyword research
Content creation
Social media
Email campaigns
Reporting
Each task can have its own deadline and owner.
You could then create another List for:
Client Requests
This is where incoming requests are collected and prioritized.
Now you have a basic client management system inside ClickUp.
You can see:
What work is being done
Who is responsible
What's overdue
What's waiting for approval
What's completed
This makes it much easier to manage multiple clients without relying on spreadsheets.
Step 21: Build a Simple Business Workflow
If you're setting up ClickUp for the first time, I recommend starting with a simple structure.
Here's an example:
Workspace: Business
Space 1: Operations
Internal Tasks
Recurring Work
Space 2: Marketing
Content Calendar
Social Media
Campaigns
Space 3: Sales
Leads
Follow-Ups
Proposals
Space 4: Client Work
Client A
Client B
Client C
Space 5: Team
Onboarding
Training
Internal Requests
You don't have to copy this exact structure.
The goal is to create an organization system that reflects how your business actually operates.
Start with the areas you need today.
Don't build a complicated system for problems you don't have yet.
Step 22: Set Up a Weekly ClickUp Routine
The best ClickUp workspace is one your team actually maintains.
A simple weekly routine can help.
Monday
Review upcoming tasks and deadlines.
Tuesday–Thursday
Complete and update work as normal.
Friday
Review completed tasks and outstanding work.
End of Month
Review project performance and update your dashboards.
You can also use a weekly review to identify:
Overdue tasks
Unassigned tasks
Blocked projects
Overloaded team members
Upcoming deadlines
This keeps your ClickUp workspace from becoming a digital graveyard filled with outdated tasks.
Common ClickUp Mistakes Beginners Should Avoid
1. Creating Too Many Spaces
Don't create a Space for every small project.
Spaces should represent major areas of work.
2. Using Too Many Statuses
A workflow with 15 different statuses may look sophisticated, but it can become difficult to manage.
Start with:
To Do
In Progress
Review
Completed
Add more only when necessary.
3. Creating Tasks Without Owners
Every important task should have someone responsible for completing it.
4. Giving Everything a High Priority
If every task is high priority, priorities become meaningless.
Use them selectively.
5. Building Too Many Automations
Automation is powerful, but too many automated rules can make your workspace difficult to understand.
Start with a few repetitive processes.
6. Trying to Use Every Feature
You don't need to use every ClickUp feature.
Start with:
Tasks
Lists
Views
Assignments
Due dates
Then gradually add:
Automations
Dashboards
Docs
Forms
AI
This approach makes the platform much easier to learn.
The Best Way to Learn ClickUp
If you're a beginner, don't try to master ClickUp in one day.
Start by building one real workflow.
For example:
Create a Space
↓
Create a List
↓
Create 10 Tasks
↓
Assign Tasks
↓
Add Due Dates
↓
Move Tasks Through Statuses
↓
Add Subtasks
↓
Create One Automation
↓
Build One Dashboard
Once you've completed that process, you'll understand the core of ClickUp.
From there, you can gradually explore advanced features based on what your business actually needs.
The goal isn't to become an expert in every ClickUp feature.
The goal is to create a system that makes your work easier to manage.
Final Verdict: Is ClickUp Worth Learning?
ClickUp has a learning curve.
There's no point pretending otherwise.
The platform has a lot of features, and understanding how everything fits together takes some time.
But once you understand its basic structure, ClickUp becomes much easier to use.
The most important thing is to start small.
Don't build a massive workspace on your first day.
Create one Space.
Build one project.
Add a few tasks.
Assign responsibilities.
Set deadlines.
Then gradually introduce automations, dashboards, Docs, Forms, and AI as your workflow becomes more mature.
That's the approach I'd recommend for most businesses.
ClickUp is at its best when you treat it as the central place where your team organizes and executes work.
If you set it up thoughtfully, it can replace a collection of disconnected spreadsheets, task lists, and project management tools with one structured workspace.
And that's ultimately what makes ClickUp worth learning.
It isn't just about managing tasks.
It's about building a repeatable system for getting work done.
Frequently Asked Questions
Is ClickUp difficult to learn?
ClickUp has more features than many basic task management tools, so beginners may initially find it overwhelming. However, the core system is relatively easy to understand once you learn the Workspace, Space, Folder, List, and Task hierarchy.
What should I use ClickUp for?
You can use ClickUp for project management, task tracking, team collaboration, client work, marketing campaigns, sales workflows, operations, and many other business processes.
How should I organize ClickUp as a beginner?
Start with a simple structure. Create a Workspace for your business, then create Spaces for major areas such as Marketing, Sales, Operations, or Client Work. Add Folders and Lists only when you need them.
Can ClickUp replace project management software?
ClickUp is itself a project management and work management platform. Depending on your workflow, it can potentially replace several separate tools for task management, project tracking, collaboration, documentation, and workflow automation.
Is ClickUp good for small businesses?
Yes. Small businesses can use ClickUp to organize projects, assign work, manage deadlines, and automate repetitive tasks. The key is to keep the initial setup simple and expand the system as the business grows.
Can ClickUp be used as a CRM?
Yes. ClickUp can be customized to manage leads, sales pipelines, follow-ups, and customer workflows. However, businesses with more advanced CRM requirements may still prefer a dedicated CRM platform.
Related Articles
ClickUp vs Notion: Which Is Better for Your Business?
ClickUp vs Monday.com: Which Project Management Tool Is Better?
Asana vs ClickUp: Which Project Management Platform Should You Choose?
Monday.com Tutorial: How to Use Monday.com in 2026
Create a Simple CRM Using Notion


